Saturday, 27 June 2015

Zaron gel liner review (current favourite)

Somewhere in my posts you must have found what my current gel liner is at the moment.If you haven't,please feel free to click here.
I will keep this within the confined area of pictures and description no much grammar :p

leggo!

These are the zaron gel liners I picked up in jazz(black ) and jean(blue).
packaging

gel liner in jazz (black)
gel liner in jean (blue)


swatches


both colours used to line my eyes (black in the waterline and lid and blue underneath my eyes)to create a make up look.


I took off my false lashes and the gellies did not budge! Don't you just hate seeing some cracks or streaks on your liner after taking off your lashes? this is because  some of the liner  gets stuck to the lash band following it as you take it off.

 Downside to this is that it takes some time to dry after application,so leave a bit of time before putting on your mascara or false lashes after using the liner. Also, its creamy so it can easily travel into the eyes  so be careful.

Thank you for reading. Ciao.

follow on instagram: @fabbydeinma
facebook:fabbydeinma
youtube:fabbydeinma
for enquiries: deinmakalio@gmail.com
 John 3:16 : For God so loved the world, that he gave his only begotten Son, that whosoever believeth in him should not perish, but have everlasting life.

Friday, 19 June 2015

Eyeliner illustration with pictorial(Eyeliner series 3)


 Hi hi! If you have been following my blog you will see I have gone a bit crazy with eyeliners and made a series about different topics on eyeliners :D. I have come again :p with part three of the eyeliner series,this one is a pictorial with simple explanation.If you haven't read part 1 and 2 please be sure to check here and here .Enjoy!


 1: eyeshadow on fleek! without eyeliner :D :p .

2: eyes looking snatched after baby girl spread some wings with a liquid liner . You can see it gives the eyes more definition ,direction and a feline/cat eye look

3. I put a some liquid liner right under my lash line.This is what I meant when I wrote that you do not always have to line your waterline(read here).It gives it definition and good for small eyes because it makes them appear bigger with some definition too

4: In this final picture I smudged the liquid liner with a bit of black eyeshadow and a cotton swab(you can use a brush too,I use a cotton swab because that is easier to get anywhere for those that do not have brushes).Smudging takes away any harsh line ,making it look more natural and blended into the eyeshadow on my tear duct.
Put some mascara and you are good to go! beautiful eye make up, no lining needed in the water line and it still looks great. Note how I put some shimmery white eyeshadow on my tear duct area to make my eyes brighter and a bit bold.

Thank you for reading.xoxo

Daniel 1:1 : In the third year of the reign of Jehoiakim king of Judah came Nebuchadnezzar king of Babylon unto Jerusalem, and besieged it.

What you should know about your eyeliners (Eyeliner series 2)

Hello everyone.Hope you are all well? I started an eyeliner series for my newbie/professionals :D so I am back again with a few things you should know about eye liners.I want to keep this as simple and quick as possible. Enjoy.

 Shelf life
Try as much as possible not to use any eye product for too long, eyeliners and mascara should be on the shelf for six month tops.To avoid keeping them for so long try investing in one brand at a time or give out eyeliners that you do not find yourself using or else you will have different brands that will not be exhausted in six months leading to wastage because you have to discard it(trust me I know).

Is sharing always caring?
Minimize how you share your eyeliners.I know on a girls night out while getting ready we love to try out each others make up but let the boundary be your eye liners, they are fertile ground for breeding bacteria and you can get eye infections just by swapping used eye liner.

Be vigilant
Always check the contents of any eye liner products you buy. Even if contents are safe but you still experience discomfort in your eyes after usage of a certain eye product(or any make up) discard immediately. I have had the worse itch and irritations from good eye products, though I had to take my time and use one eye product at a time from the ones I use on a daily basis to see which gave me allergies it was worth it,it ended up been a drugstore mascara which I discontinued immediately.Also if your client complains about irritation,stop use of product immediately. Always go for ophthalmologist tested eye products i.e products that have been tested on many customers including contact lens wearers and are deemed safe for use around the eye.

Breeding ground
I know many of you reading this one will roll your eyes and laugh but truth is as much as possible reduce the use of eyeliners on the waterline and tightlining too. Yes ,it seems impossible even for me too but that is one of the best eye health advice I can give for the long run. Eye liners especially pencils can breed bacteria easily and constant use in the eyes can dim ones eyes and have long term effects.I did not say do not waterline or tightline at all o! even for me it was hard but I am doing it, all I am saying is just minimize it, bring it down a notch , I am just saying if you do not need to line the eyes because you have some fleeked (if thats a word) eyeshadow going on then don't,your eyes will thank you for it. Go for regular eye check up as often as you can and take lots of carrots and stuff that are proven good for the eyes.

Shine bright
Brighten up your eyes with a swipe of white or gold eyeliner on the waterline to brighten them up and make them look bigger or dab some gold/silver eyeshadow on the tear duct for a fresh dazzling look. Take a thin brush and gently pat some translucent powder on the waterline(be very careful) before applying gelliner,this keeps then in place for long and keeps it from travelling south.

Go waterproof
If you want long lasting the best bet is to go waterproof. Most people don't like water proof make up because its hard to take off,literally! you have to tug and pull,scratch kick and tear!okay I am been very dramatic :p. With a good eye make up remover and a cotton pad is enough to take up most waterproof make up, take a cotton swab soak in make up remover and remove eye liner that are stuck in the waterline and lashes.

 tighlining aka invisible liner: This is a beauty trick that makes the lashes look fuller and longer even without mascara making the eyes look bigger giving the illusion of no eye make up. Instead of lining your eyelid before the lashes , go underneath instead.Basically,instead of lining down as usual you just line up!. Raise your upper lid,look down and line the waterline with a brush or soft pencil.Use the pencil and go back and forth just where the roots of the lashes meets the rim/waterline,repeat till the area is dark enough for you, stop just before the inner corner of the eye (where your lashes become sparse or where the lashes stop being full) to avoid getting beady eyes. Never use liquid liner for tightlining unless you are a pro pro (see how I used two pros there). Use a soft gel liner or mechanical pencil (waterproof ones are the best option) so you have little or no speckles of products getting into the eyes.Clean up any excess with a cotton swab and make up remover or just smudge it out.


waterline: the wet line of skin that leads to the tearduct. Usually the soft skin right before the skin where the roots of the lashes are.It is basically where tears form when you want to cry or putting liner.

Thank you for reading.xoxo
Jeremiah 32:27 : Behold, I am the LORD, the God of all flesh: is there any thing too hard for me?

Eyeliner types and the side effects of kohl/kajal (Eyeliner series 1)

I am a huge eyeliner fan and I absolutely think eyeliner must be in every girls/guy make up purse. You can find different types of eye liners in my make up collection*don't judge me* :p 
With or without eyeshadow,foundations or concealer. eyeliners and a quick smudge of lipstick can make the face appear bright and with so many colours out there, one is free to express their style through it.
I will say it’s important to experiment with eyeliner to figure out what suits you, but let’s be real, this stuff isn't exactly cheap especially if you want quality( I strongly advise you go for quality eyeliners,as they are used for a sensitive area of the face). I personally do not mind splurging on eyeliners seeing I am a make up artist and vlogger/youtuber that has to practice make up looks but Lord have I spent on eyeliners!I have spent high and low for good eyeliners and sometimes(not all the time!) I realise the low was better than the high,I will splurge on some acclaimed high end product and it will just dry out :( where as I will use the low budget ones for long but truth be told after I research on the ingredients of what I buy,the high end ones are better off for the health of my eyes.Beauty is pain but not in health sense,no ma'am I had rather be healthy than risk my eye for some cheap stuff. I decided to write this from my own experience and give a little bit of guidance.If you’re new to eyeliner, I hope this will help you save some time and money as you go on your quest.


Liquid:.Liquid liners are perfect for creating perfect wing liner shapes and applies in a smooth and sleek manner.These eyeliners might not be the easiest  to work with for beginners especially but with patience and practice you will find it easier and even reach for it very often.I started using liquid liners from the age of 13 or so and let me tell you the truth,girl's eye game was not on fleek!it was a mess and I end up cleaning it before I even wear it out and my eyes will itch because of the amount of liquid that got into them, my eyes suffered sha o!but as the months went by I mastered it with constant practice.They are great for double application to achieve defined and pronounced looks,it can be used before gel liners to make intense and long lasting eye looks.They dry easily and hardly take off eyeshadow speckles that make one have to reapply eyeshadow after application of eyeliners. I love liquid liners because they reduce accumulation of bacteria, this is because most people use them for the top of their lids and underneath the lashline instead of in the water line.However, if you are one of those who use it in the rim of your eyes or clients eyes then do not transfer use of liquid liners between clients as the transfer of bacteria is easy and this is very dangerous.If you must use liquid liners pour liquid into a pot and use a  make up brush instead. Start from the middle of the lash line on your lids and brush with short strokes till where you want it to stop,then start at the inner part of the eye and repeat short strokes till you connect it to the middle where you started(I might do a pictorial soon).


Pros
creates thin sleek lines
can be used for dramatic eye look,wing liners and arabic make up
one can mix with other type of eyeliners

Cons:
if not carefully applied they can leave streaks on the lids
it is one of the most difficult liners to start with as they are bold and slick, I think newbies should try other liners first before this.
if not covered or held properly it can spill and leave a mess
can easily get into the eyes before it dries

felt/tip liners: This for me is like an improved version of liquid liners with less spilling if I may add.They are like felt/tip pens(e.g correction fluid) or markers hence the name.These liners have a firmer tip making it easy to control and they come with the brush attached to the pen,all you need is to tip it over as you would for a felt/tip pen and the liquid seeps through. If you are struggling with liquid liners you should try this out,it still needs steady hands but you might be better of with these as a beginner.

Pros:
They are easy to control
can be used to achieve thin crisp lines
comes in waterproof version which doesn't smudge
can be found in any drugstore with different brands

cons:
if not properly covered they dry very fast


Pencil: I am sure most girls have encountered a pencil liner when they tried make up for the first time.Most make up newbies find this the easiest to use in terms of application and management.From dual ends pencil liners with different colours to push up and mechanical roll up pencils the eye pencil is an old vintage chap that gets better and advances through time,just like fine wine :). Professionals love them because they are easily workable and very versatile, it can be smudged to create smokey effect on the eyes, layered thinly or thickly to bring out the eyes and also create dramatic eyes. Eye pencils come in so many different colors and are one of the best options to go for when opting for colors to play up the eyes. Pencils are a great attraction to eye bacteria because of the method of application hence one has to be careful with using them, that is why I always opt for the ones with sharpeners so I can sharpen them after every use, its quite a hassle but its worth it, better that than eye problems.I always find myself reaching out for them for my waterline or to create a quick simple and sultry make up look.

Image result for pencil liner:


 Pros:
Easy to apply and newbies have control over them
Various colours and types are easily accessible at affordable prices
They are timeless and every make up brand has an eye pencil
Versatile and can be used to create many look
  Cons:
   Easily attracts bacteria
    Application can be time consuming
Unless constantly sharpened, a crisp defined line is hard to achieve

Gel/cream liner: These liners has always been associated with make up professionals, this is because it last longer,dries to a matte finish and can be used as an eyeshadow base to make eyeshadows stand out,when I write base I don't mean for all colours of eyeshadows,take for example you want a thick dark lasting smokey eye;before you start off you can use a black/dark green/dark blue cream liner before applying the eyeshadow.Hope you get my drift. It comes in small pots and a little application brush used to apply the product. Cream liners always comes with intense colour(especially black),they are soft, glides on easily and dries up matte!,they can be smudged to create any look but one has to be quick before it dries up.They are one of my favorites at the moment but if not properly closed or stored they dry up pretty fast and you end up with hard rock in a pot.I have had my share of gel liners.The only ones I have not heard or read reviews about drying up is the inglot(I would have added zaron but I have not used it for long yet,I will keep you updated) I might be wrong about the drying up part for inglot but I heard they are amazing! I have not gotten mine yet as I cannot find it online and I haven't been to Lagos yet.
Image result for gel linerPros:
long lasting
can be used as an eyeshadow base
comes with an application brush
smudge proof
pots can be re used for other products e.g loose eyeshadow
transfer of bacteria is minimal to none as brush can be washed and cleaned with alcohol after use

Cons:
Most are expensive although the prices are becoming flexible       now
                                                          can easily dry up if not covered properly
                                                          If one loses the brush, a new brush is needed
                                                          Not portable and application is longer
                                                          Pen liners. can create pretty thin lines

Kohl/Kajal gives depth and intensity and widely recommended to create dramatic eye look. I am not a big fan of kohl, I have never really been but more so since it came to my knowledge that they contain high amount of lead and certain chemicals that can be dangerous for the eyes and the internal parts of one's body. My arousal was actually raised by my lovely aunt after she sought my advice on eyeliners because a friend of hers heard kohl contains lead, yes I agree that various eye products do contain chemical substances as well but I quickly did my research to confirm if it was true or not so I know what advice to give and realized that the importation of kohl is not approved in the US after studies link high usage of kohl and lead in the blood stream of children. If real kohl is found in the US it is either smuggled or illegally imported because it is not FDA approved. 

Image result for kohllinerKohl/Kajal is believed to have healing effects however, has its side effects leading to eye allergies,eye infections and lead poisoning.Ingredients used to making kohl/kajal/surma(sandalwood,ghee,castor oil,lamp-black etc) are known for its medicinal properties because they are toxic to bacteria hence provide relief from conjunctivitis and eye infection.However,these toxic materials contains high amount of lead with ingredients like lead sulphide(galena) or antimony sulphide(stibnite) which finds its way into the bloodstream causing lead intoxication,anemia,low IQ,learning difficulties,retarded growth and with high usage causes kidney failure,neurological damage which may lead to coma and death. Please always check the ingredient of the kohl you buy for lead or chemical additives and if you are not sure,send the company an email with your concerns.Do not buy unlabelled kohl and be careful of the ones purchased in markets,local stores or gift shops.Traditional kohl should not be confused with modern kohl pencils,Kohl is powdery in its true form and very dark ,modern day kohl labelled pencils/liners have gone through extensive screening and they are labelled kohl not because of its content but as a comparison to the from of the real kohl,that means a kohl labelled pencil can be darker than a normal eye liner.Kohl that has apparently(watchword) been found to contain high lead in it are:Hashmi Surma Special,Pure Kohl from the Waters of ZamZam,Hashmi Kohl Aswad,Hashmi Kajal but on their websites it states otherwise as they have evidence of non toxicity reports, I cannot give an advice on these products if you are satisfied with the reports that is fine,do your research and a lead blood test (if its that serious) might help. I know it can be frustrating to know that one of your favourite eye products contains something that can be harmful to your health but all hope is not lost!Guerlain(here)supplies a good powdered kohl with no lead in it,its a tad bit expensive but if you love your kohl liners then you should go for it,also try known and popular brands but always check and research the ingredients.Remember it will not state this eyeliner contains lead.lol


Eyeshadow: This can be a great substitute for any type of eyeliner, just smudge any colour of eyeshadow underneath the lash line for a subtle but visible smokey look.They are very fun to play around with and great for mix and match.Smudge some black eyeshadow with an angled or small fluffy brush sprayed with make up setting spray(its not necessary if you do not have it)underneath your eyes and stop halfway before your tear duct to create bigger eyes, also highlight your tear duct with some gold or white shimmery eyeshadow to awaken and brighten up the eyes.
   Image result for eyeshadow pots    Pros:
                                                                lots of colourto choose from
                                                                can be used for subtle or dark lines
                                                              It can be used to correct uneven eyeliner or get rid of harshlines from eyeliners       
                                                             cost effective and saves time 

 Cons:
cannot be used inside the waterline as it irritates the eyes and will not last(if you have any ideas on how to make eye shadows stick to the waterline please comment below)
it can smudge easily and will not last long

Cake liners: cake liner is a water based highly pigmented eye liner that comes in a compact and can be applied effectively with a wet eyeliner brush. Depending on the intensity you want ,you can adjust the intensity of the line to be natural or very dramatic.
Image result for cakw eye linersIt can be smudged or adjusted easily before it dries,it leaves a smooth line,does not flake and lasts long. I cannot really state any con except maybe the colours to choose from are not that many. I haven't used it yet so I can't be a great judge on the pros and cons,If you have ,please comment below.


Thank you for reading.xoxo

Photocredit:google


Proverbs 3:5-6 :Trust in the Lord with all thine heart; and lean not unto thine own understanding. 6In all thy ways acknowledge him, and he shall direct thy paths.

Sunday, 24 May 2015

Eyebrow pictorial

Hello everyone. A happy sunday to you! Today I bring an eyebrow pictorial your way.Enjoy.


Products used and little tutorial:
Davis brow pencil in 018
Mary kay concealer in bronze 1 and fraulein concealer brush underneath the brows
Black opal foundation/concealer in beautiful bronze with the same concealer brush for on top because it blends into my skin beautifully. The top of the brows should always look natural. Use a concealer closer to the skin tone or just try mixing the concealer with your foundation.
Blend concealer with fraulein eyeshadow brush to avoid harsh lines
Brush out the tip to make it look natural with a spooli or a little brush(I used the one from my zaron brow definer kit)
Zaron brow definer to finish off

Jeremiah 32:27:Behold, I am the LORD, the God of all flesh: is there any thing too hard for me?

Saturday, 23 May 2015

How I got rid of my hair monster! (Dandruff)

Yes! I am one of those that have struggled with that dandruff for months! I can't remember when it started or the cause, but I remember going to the salon every two weeks and the salon lady will be like hmmn! this your hair e full o but dandruff full am too *covers face*. Either that or every other day, she would offer me a different type of cream or dandruff removal products. I just smile and politely decline. I always declined not for fear of the products not working (maybe a little bit) but mostly out of exhaustion and frustration. I had tried almost everything! I washed my hair as often as possible(even though this worsens it actually), creamed, Vaseline and oiled it regularly with both dandruff and non-dandruff healing ointments. I took every form of advice- scrub harder, wash your hair everyday, comb every dandruff out (I know right!*rolls eyes*). It was really embarrassing because no matter the hairstyle I did,these white garri- like monsters always showed themselves, making me take out my weave or extensions earlier than normal. It was the worse case of dandruff I had ever experienced. I went online and searched for cures for deep dandruff and I saw people's experience and solution. One thing that popped up on every solution was the name ''Apple cider Vinegar''. It took me back to the days of salads and all, I have no idea why to be honest. I got a bit frustrated with the name, because  to the best of my knowledge, the only vinegar I knew was just vinegar; all the names confused me. I left it for a while and went back to my creaming, washing and oiling. Fast forward weeks later, I went back to the site to look for alternatives, but vinegar seemed to be the easiest at hand, well, that and coconut oil. I decided to go to the mall. The vinegar had one fancy name so my best bet was that the mall would have it. On getting there,  after about 2 minutes, Viola!!!! I found it! I saw the vinegar but started looking for the "apple cider one".  I almost left the mall, but decided to check again;  lo and behold the vinegar I have been seeing since was actually apple cider!  Yeah I know, blonde moment :p. I just never took notice of the apple cider. I always thought vinegar was vinegar o and it wasn't even expensive; cost about #400.


 I got home and followed the instructions- two or more caps mixed with water, well some say you can apply directly, but vinegar is harsh, to be on the safe side,  just mix two caps with half cup or more of water. After washing and conditioning my hair, I poured the mixture as a final rinse and massaged it into my scalp.  I then rinsed everything out with ordinary water so the vinegar doesn't linger for too long. Some people would shampoo, vinegar rinse and then condition , but I prefer the first way; maybe on my next wash I will do the latter. I gently pat my hair with a soft dry towel just to get dripping water out and five seconds later of course I started itching again. I really can't tell if it was my mind set or just the dandruff screaming ''you can't get rid of me so easily, your hair is my home!!!'' I let my hair air dry for about two minutes because it was always during this period the dandruff becomes visible again and starts itching whenever I wash my hair. I picked up my mirror to see if it worked  and Yes! it did, it was unbelievable.  I took my fingers and parted all my hair- Nothing!!!  I even went to my sister and asked her to check but she said my hair/scalp was clean.That is how I got rid of my hair monster! With #400 and a simple off-the-kitchen cabinet liquid, four months later, I haven't had an episode or any itch,  but I need to treat my hair with it again to avoid any episode.
You can leave the vinegar for five minutes after shampooing just to let it do its job, have a shower and rinse off with cold water. Vinegar also makes hair very shiny, silky soft and healthy-looking. Please do not use this method if you have injuries on your scalp,consult your doctor.

Here is why vinegar worked

Dandruff is caused by oily skin, dry skin, use of high alkaline hair products, stress, diet ,sweat from exercise  and oil build up. Another major cause is malasseiza; this is a yeast kind of fungus that feeds on oil form hair follicle therefore causing skin irritation and dead skin cells.The acid content in Vinegar helps reduce the itch, flakiness, and gets rid of dead skin cells. It basically goes down to the root of the hair to take all that build up and mess away. An imbalance in the pH level of one's hair can also lead to dandruff. The scalp and the hair run their world (no not girls), and they love to function in a certain kind  of way: producing hair oil, helping that little hair grow and just maintaining a level of sanity in there. However when there is an imbalance in the pH level of your hair from the above causes, guess what? the workers are not happy. some of them quit some sulk and some form a strike group and maybe after dropping all their white cardboard strike papers it comes out as dandruff. Vinegar helps in balancing the pH level of your hair, more like returning the factory of your hair/scalp routine to normal.

This solution really helped me I just had to share and I hope it helps you too if you struggled like me or just need to keep dandruff at bay. If you are not really check online into the vinegar method check online for other alternatives,I have read coconut oil and aloe vera are good in balancing pH level of the hair too. However this worked for me tremendously so I am sticking with it.I use coconut oil in my hair care routine too so I am guessing it helps.

quick tip off: the smell of vinegar is harsh but don't worry it will go away when your hair is dry.close your eyes while rinsing too,Vinegar should not get into your eyes!


Jeremiah 29:11 : For I know the thoughts I have towards you,thoughts of good and not of evil in order to bring you to an expected end.

xoxo


Tuesday, 19 May 2015

FOOD AND SKIN RELATIONSHIP (Part One)

It is amazing how much we can spend(including me ) on skin products just to make our skin look good or better than it is when the simple and inexpensive solutions are around us. I have tried out cleansers and supposed toners(not for bleaching purpose ) just to get healthy looking skin,I am not saying they aren't good but I always fall for hyped and expensive stuff. I am one of those who think ''the higher the price,the better the product'' and although this is actually the case in certain products ,from my experience I have learnt that not every product can have the same effect on two different people.If it worked on my sister or friend it might not work on me. Hence for years I have come to know how my skin (especially my face) works, what it reacts to,what makes it look healthy and why I have certain skin problems at a particular time.

There are certain foods and fruits we can't ignore when it comes to maintaining healthy skin This does not abolish using recommended or prescribed creams for the face or body,neither does it take away one's personal routine of body grooming and maintenance. These recipes do not replace use of normal shower gels or soap and moisturizer.They are just guides to promoting skin care and knowledge of what foods/fruits can do for the skin ,these foods promote healthy skin and even slows down the visible signs of aging.

Avocados or Alligator pear: People tend to think that avocado is very fatty and should not be touched. This is very true, avocados do contain high amount of fat but majority of the fat in avocados is oleic acid, this is mono-saturated fatty acid and is one of the major ingredient(s) in olive oil  and we all know you can't go wrong with olive oil.They are fats with more benefits than dangers hence healthy to eat in moderate proportion. I realize that not a lot of people like this food as much. If you are one of those who wants a healthy glow (and for the sake of other numerous benefits of this green wonder) but detest the taste ,try putting it in salads, use as a spread for bread or use it to make a face mask, if you cannot be bothered to make your own, when buying a face mask,look for one made highly of avocado pears. They are filled wit h healthy fats, antioxidants and lots of moisture and can be used to aid or completely heal dry skin, oily acne prone skin and avocados contain omega 3 fatty acids which helps increase elasticity of the skin thus helping anti aging.

Here are two recipes for avocado face mask:

For dry skin: Mash the avocado into a smooth paste,stir in half or one spoonful honey,mix and apply on face using circular motion. Leave for ten minutes and rinse off using a clean wash cloth.Follow immediately with moisturizer.

For oily skin or an oil control face mask: 1 egg white and a quarter ripe avocado.mash ingredients and mix/whip with a fork, application can be messy but its worth it. try applying mixture from the chin upwards so it doesn't drip. Rinse off with  warm water first to loosen the egg white and then follow up with cool water.


Oatmeal: Cereal for breakfast Cereal for breakouts!. Oatmeal is a healthy source for fiber, vitamin A, protein and Iron and this is why most nutritionists recommend it for breakfast.It can be used as a facial mask and skin therapy too because of the benefits of its content. In the olden days, as far back as 2000 BC the Egyptians,Arabs,Greek and Romans used oath baths or milk to bathe in order to beautify their body, heal skin ailments, rejuvenate and smooth dry skin,it is thought to have antihistamine effect. One of the best things I like about oats is that it is suitable for all skin types. There are different types of oats,however the ones I recommend in any recipe here is groat oats which is grainy steel cut oats(example: quaker oats) or colloidal oats which is simply ground finely milled oats,comes in powdered form or to make your own, simply take it to a professional grinder or the market for grinding or use your own blender or food processor at home.You can also get already made colloidal oats,just search online.

The benefits of oats are listed below;
  • It can be used to treat acne as it contains ingredients that absorbs excess oil and removes bacteria thus the reduction or prevention of acne
  • The cereal is also good for combating dry skin and reducing flakiness due to its content of polysaccharides that melts into gelatin in water, to get the best out of it specifically for dry skin, mix ground oatmeal with mashed banana and warm milk with some drops of honey, such a yummy recipe right? apply it on the face for 10-15 minutes .Rinse off with cool water and try not to eat it too. Moisturize immediately
  • It helps irritated and itchy skin.When the skin is irritable and itchy its pH level may be higher, colloidal oatmeal helps to balance back this pH level and bring it to normal hence reducing the need to itch.  It acts as an aid to reduce irritability from eczema,sunburn,insect bites,poison ivy,sunburns,bug bites and chicken pox (just to be clear I am not referring to open wounds or serious skin infection.Please consult your doctor in the case of such). Run a bath with lukewarm(not hot)water and pour about two cups or more of colloidal oat into the bath,for wider coverage try pouring it directly under the faucet,the oats will not settle quickly instead it will make the water milky and that is a good thing.Soak yourself in the bath for 10-15 minutes or pour the water in small quantities over your body(be careful with your eyes,please close them),get out of the bath and pat dry with a towel, do not scrub with the towel as this will irritate the skin more and make sure the towel is clean and soft. Try wrapping collodial (grounded) oats in a cheese cloth or clean cotton handkerchief,pour a bit of water into it,squeeze out some water,then place the cloth on affected area or pour some oat milk in a bath and bath with it.Repeat two times a day. Ground oats are great for pets too!Follow the same procedure and soak them in it.                                                                                                 Note: please wash your bath carefully as it can be slick/slippery from the oat and be careful when getting out of the bath too.
  • Soak some groat oats in water overnight,rinse and drain oats to remove oat slime or dust that settled in the water,pour into a blender and put some water,be careful with the amount of water because more water will make the mixture come out thinner and we want thicker.Blend blend blend :) . Pour blended mixture into a fine sieve and drain till all that fine milk seeps out.Be very patient while milking especially if the sieve is not big and also wait for all the milk to drain out ,use spoon and press down the pulp.Pour milk into bottle or jar,place in the fridge and use daily with a cotton ball or pad as a cleanser and toner after having your bath or after face wash,pour it in your bath.It will help in smoothing the skin and lighten it also.Yep you read right, lighten.
  • The healthy fats in oats are lubricating and acts as a protective layer on the skin hence shielding it from UV rays.
  • It is a great exfoliator, try treating yourself with a nice mask during the weekend and feel the benefits of this food (recipe underneath)
Oatmeal mask: 
for Oily/Combination Skin 

Ingredients:
 ¼ cup cooked oatmeal
2-3 tablespoons plain yogurt
1-tablespoon honey
Directions:
Mix the yogurt, oatmeal and honey. Apply to face and leave on for 10-15 minutes. Rinse with cool water.

To exfoliate: mash a quarter of ripe avocado and one tablespoonful of ground oats, stir to make a smooth paste. After a quick splash of warm water on the skin, generously massage the mixture unto your clean face/skin for about two minutes so the oatmeal and exfoliate the skin well,let it set for 15minutes,wash it off with a soft towel and voila!. Apply very little moisturizer immediately,massaging it all over the skin.

As a scrub: mix a table spoon of oatmeal that has cooled down and the same proportion of baking soda with the same part (or more)warm water,mix let it for five minutes till it becomes soft.Gently massage the face avoiding the eye area,leave it in for tow to three minutes or more, wash off with warm water and rinse with cool water. If you do not have baking soda just try simple oatmeal with milk or oatmeal and water and repeat the process. This can be used for any skin, try it twice a week.

For dry skin: 
Blend 1 ripe avocado, 2 tablespoonful of honey,raw organic one(you know that raw honey in aquadana bottle that mama brings from the village with the bees still inside sef!ehen that wan,but remove the bees o!)with  1/4 uncooked groat oat. Apply medium layer to the face and let it stay for 10-15minutes then before washing off gently massage the mask on the face to slough off dead skin cells. The honey and avocado is a great moisturizer and the oatmeal will help with any itch,dryness,redness and balance the pH level.

For anti ageing and anti wrinkle:The key ingredient in oat that reduces ageing process is Beta glucan.Make your own anti aging mask with half cup buttermilk,2tablespoon cool oatmeal,one table spoon extra virgin olive oil and almond oil; heat up the buttermilk and oatmeal in a pot/pan till the mixture is soft,put in the oils making sure its stirred into a paste, let it cool down and spread it all over the face and neck,avoiding the eye area, rest with it for 30minutes with a slice of cucumber on each eye and wash off with warm water then rinse with cold water.Pat face dry and follow skin care routine as usual e.g moisturizer/toner.Repeat once or twice a week.

Bananas: They are very healthy and provide exceptional health benefits all round.From the skin to the fruit itself,bananas can do your whole system a whole lot of good,it is great for keeping your health in check,reducing the risk of cancer,great blood pressure control,curb morning sickness, helps the bowels, hair health ,skin health etcetera. What I love about bananas is that they are available for most of the year, they never go out of season. Banana has plenty water weight hence its a great moisturizer for the skin. This fruit/food is great for dry skin,acne, wrinkles and anti-aging.Here are some good ways to put bananas to good use for your skin.
To moisturize dry and dull /aging skin, mash one ripe banana and apply on the face,leave it for 25 minutes and wash off with lukewarm water, if your skin is really dry ,add some honey or yogurt and vitamin E oil in the mashed bananas, pat dry and follow with moisturizer immediately.  Wake up with puffy eyes that no amount of concealer will cover? try mashing half of a ripe banana and apply generously underneath your eyes,where the puffiness is and let it sit there for about 20 minutes, to reduce wrinkles put some drops of rose water to the mash and apply under the eye area.Relax and keep them close or go about your duties,the potassium will help draw out excess water that might cause puffiness. Rinse off with cool water and proceed with  applying your make up or that concealer if needed.

HoneyHoney: Oh honey honey honey! I cannot begin to explain how amazing this product is.There are so many benefits if this sweet sticky liquid ,from treating wounds and burns to curbing  nausea/morning sickness to acting as a great moisturiser and lets not forget it is natural sugar(if i am permitted to even use that word) or sweetner. You just cannot go wrong with good organic raw honey, please steer clear of processed honey as much as you can because you are using half of its natural goodness or worse if you are avoiding sugar you are basically still having sugar. I remember when I was little, you know how our parents will hear gist outside or read on it and use us kids as their experiments? from taking raw aloe vera juice to one bitter drink that till today I just do not even want to know the name! every morning my mum/dad will just come and shove one tablespoon of honey in your mouth! like! you did not even ask me if I want hian!!, if they miss one child because he/she was sleeping trust us siblings to report! Anyway back to the main topic, now I look back and I am so grateful for it, I remember once as a kid I took cold water first thing in the morning and I felt like I was going to faint! my tummy hurt like crazy and my mum gave me honey,after five minutes I was better. sorry for diverting again. Honey is great stuff and cannot go wrong with anyone, you can add it to anything instead of sugar and mix it with lemon juice as a cure for mild cold, it is a memory booster, it is great for the voice/vocal cords and helps bad breath due to its antibacterial and anti fungal properties.I cannot emphasize on how much honey can help bad breath! it has helped when I do not have gum to reach for after having garlicy or oniony(if that's a word) food. I have a lot to write about honey but I will stick to the benefits of honey for the skin, you can search for its internal and health benefits online or in books.

Benefits: Honey is a great moisturizer because of its natural humectant therefore guaranteeing long lasting hydration. To make a moisturizing mask spread a teaspoon of honey over clean dry skin,leave for 20 minutes and wash off with warm water .This is suitable for all skin types even oily or combination skin.

Stir one table spoon of raw honey with jojoba or coconut oil till it is of a spreadable consistency, apply to face avoiding the eye area and massage in circular motion.Leave for a few minutes with continuous massaging and rinse with warm water. The enzyme in the pure honey will keep the pores on your face clear and clean,the anti bacterial properties in all ingredients will also prevent bacteria build up. You can do this once a week.

To help acne treatment, dab raw honey to affected area, let is sit for fifteen minutes,rinse off with warm water.
calm sunburned skin by mixing one part raw honey and two parts pure and raw aloe vera gel and apply to sunburned skin, they both contain powerful anti inflammation and the moisture from the honey restores hydration to burnt skin. To get rid of sun tan,mix equal parts honey,milk powder,almond oil and lemon juice,apply to affected areas and leave for 20minutes. Rinse off well.

Get rid of those annoying pimples that just pop up from nowhere by mixing  equal part cinnamon and honey, dab it on the pimple(s) and leave overnight.rinse with warm water in the morning and pat dry,do not scrub face with towel.

Relieve injuries and reduce visibility of burn scars by applying raw honey regularly on it. For a deep scar fade, mix one teaspoon raw honey and one teaspoon olive oil/coconut oil, apply on affected area and massage in circular motion for three minutes,place a hot wash cloth over it and let it stay there till it cools own,repeat this daily. The anti inflammatory and anti bacterial properties of the honey will help healing and tissue regeneration,the hydrating properties of all the ingredients will also help awaken the skin cells and the regular massage will aid circulation and cell repair.

Mix two tablespoons of honey with one table spoon baking powder,splash skin with water then gently rub the mixture on wet skin with circular motion.Rinse properly.
For silky smooth moisturized skin,mix two tablespoons of honey in warm water and pour in bath.soak in it for as long as you want to.
Mix one tablespoon of honey with almost a handful of shampoo,lather your hair and rinse.
Mix one teaspoonful of honey,apple cider vinegar and coconut oil, rub on cuticle and leave for five minutes.The honey draws and retain moisture in the skin, the coconut oil will condition and protect it and the acid from the vinegar softens the tough skin and balances pH level. rinse off.
Mix one teaspoon of honey with1/8cinnamon and half cup warm water, gargle with it twice a day(morning and evening preferably) to  curb bad breath or swallow a teaspoonful of honey in the morning or at night.
tip: to find good honey try dipping a matchstick into it or pour some on it and try lighting it, if goes ablaze, its not raw and pure but if it doesn't then its good raw original honey.Go thank the bees!...........or maybe not.
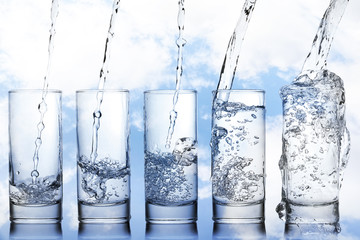


pouring waterWater: No matter how great one's skin looks, the benefits of natural spring water cannot be over emphasized. To promote healthy skin,drink as much water as possible,it is very beneficial for the skin and rids the body of impurities. To keep your skin hydrated without drinking water as often as you would like to due to certain reasons ,try spraying it, this is known as mist(ing). It is very amazing and one of  the best natural way to moisturize the skin.Moisture keeps the skin very soft and supple, that is why it is recommended to apply moisturizer/cream on wet skin because it locks in some water to keep the skin hydrated especially in cold weather condition. Get a spray bottle(check here ,here and here) and put clean cool water in it, spray it on the skin/face wherever you are as often as possible. Make sure  the water is replaced with a new one everyday or as often as possible. Rose water or rose water mist is also very good, it is very hydrating,nourishing and leaves the skin especially dry skin feeling refreshed. Place a bottle of rose water in the fridge(not freezer) and use it as often as you want especially in humid condition or leave it in the fridge for half an hour, place on a cotton pad and gently place underneath the eyes to reduce puffiness.Rose water can also be used as a natural aftershave on the face and legs because of its soothing effect and nice after scent. To keep your make up a bit dewy, spray a bit of rose water sparingly after make up to set your face. Also try the evian natural mineral water spray, they are very portable,can be use as a setting spray and stylish (check here).


1timothy 4:4-5;For everything created by God is good, and nothing is to be rejected if it is received with thanksgiving, for it is made holy by the word of God and prayer. 

Picture credit: Fotolia