Monday, 2 November 2015
Tuesday, 27 October 2015
ombrè lip tutorial
Apologies for not posting any make up tutorial in ages, I have not forgotten and I will try to keep up on it.
The ombrè lip has been around for a while now in fact I think we started the trend or brought the idea up as far back as the 90's , we all once lined with black pencil and filled in with lipgloss lol! but now these lip trend is modernised, better , less tacky and very beautiful when properly done. Every make up fanatic, artist or beginner needs to know how to achieve an ombre lip.
Whenever the name Ombrè is mentioned one thinks of colour combination, wavy transition from light to dark or dark to light. It describes the blending of one colour hue to another and involves the use of tints and shades transitions.
Ombrè can give full or smaller effect because of its transition and colour combination depending on what it is used on. I think for anything to be worthy an ombrè it has to have a transition not just sharp change in colour.
In this post I show a step by step on how to achieve an ombrè lip.More looks will come gradually in between posts but this is just a start.
 Moisturise lips first or prep lip by using scrub (post here)
Put foundation or concealer as a canvas for every lip product that will go on it
 Sweep some powder to mattify the lips a liitle
 Line lips with a very sharp lip pencil starting from the outer corner.
Note this is a dark pencil, the dark pencil is use to line or is the
starting point of an ombrè lip
Line lips with a very sharp lip pencil starting from the outer corner.
Note this is a dark pencil, the dark pencil is use to line or is the
starting point of an ombrè lip
 Start lining your upper lip too by creating a vee on the cupids bow. That way it is easier to draw and define one's cupids bow

Don't leave the outer corners, most people neglect that part and it is very important in this look or any lip beautification
 Fill that part in too by opening your mouth , outlining and close back
 Create a vee on from the corner of your lips and fill it in stopping at one quarter of the lips leaving space for other lip products. The vee makes the transition very visible
 Begin to fill in the empty space with a brighter colour. I am using jordana pencil in red
 Fill both top and down half way too
 I decided to add some more red lipstick with a brush for an extra pop of colour but this is not necessary
 Now fill the rest of the lip with the lightest shade of lipstick/lip liner or lip stain.You can also use a white pencil for this
 Fill in the upper and lower lip.
 The key to the perfect ombre is proper blending. Blend softly with your finger tips towards the outer part of your lips but not fully till you see a transition forming, you can blend with a brush too or just smack. You can re apply a liitle liner to restore the vee at the corner of the lips to make it darker but it is optional
 You can clean any rough edge with a concealer/foundation and brush, this makes the liner appear smoother and crisp.
 It should look like this when you are done. You can add lip gloss for fuller lips or leave it matte, your choice. Use a brush or finger to dab some lipgloss as opposed to swiping hard so you do not ruin the lip colour combination.
Ombrè lips can be used to make the lips look fuller or smaller.
it is creative and interesting and believe it or not with practice it is very easy.
The trick is to use different blend of colors. Example; Berry for outer lip, red for inner and nude to finish off inner lip. Black, berry then nude, Purple, light purple, white etc. I love that you can play with colours. I will be posting darker looks, nude, how to use lipsticks, highlighters and eyeshadow to achieve an ombrè lip in between posts so be on the look out for them.
NB: the cupids bow is the upper lip where a v is formed right underneath the nose
I hope you try this out!
Thank you for reading.
The ombrè lip has been around for a while now in fact I think we started the trend or brought the idea up as far back as the 90's , we all once lined with black pencil and filled in with lipgloss lol! but now these lip trend is modernised, better , less tacky and very beautiful when properly done. Every make up fanatic, artist or beginner needs to know how to achieve an ombre lip.
Whenever the name Ombrè is mentioned one thinks of colour combination, wavy transition from light to dark or dark to light. It describes the blending of one colour hue to another and involves the use of tints and shades transitions.
Ombrè can give full or smaller effect because of its transition and colour combination depending on what it is used on. I think for anything to be worthy an ombrè it has to have a transition not just sharp change in colour.
In this post I show a step by step on how to achieve an ombrè lip.More looks will come gradually in between posts but this is just a start.

Put foundation or concealer as a canvas for every lip product that will go on it


Don't leave the outer corners, most people neglect that part and it is very important in this look or any lip beautification


Ombrè lips can be used to make the lips look fuller or smaller.
it is creative and interesting and believe it or not with practice it is very easy.
The trick is to use different blend of colors. Example; Berry for outer lip, red for inner and nude to finish off inner lip. Black, berry then nude, Purple, light purple, white etc. I love that you can play with colours. I will be posting darker looks, nude, how to use lipsticks, highlighters and eyeshadow to achieve an ombrè lip in between posts so be on the look out for them.
NB: the cupids bow is the upper lip where a v is formed right underneath the nose
I hope you try this out!
Thank you for reading.
Psalm 113:4; The Lord is exalted above all the nations, his glory above the heavens
Cracked , Dry and Chapped lips solution
This is a preparation post (before lipstick application here) and recommended cure for people that struggle with chapped, dry or cracked lips.

Chapped lips can be frustrating and embarrassing but there are simple ways to reduce the appearance of dry cracked or chapped lips.
Use olive oil/coconut oil/honey and granulated sugar mix as a light lip scrub. This can be a long term solution for dry and rough lips.The sugar is known for sloughing dead skin cells away and the olive oil for proper moisturisation , the coconut oil also helps in proper moisturisation and healing burns.
Mix half teaspoon of olive oil with one teaspoon of granulated/ground sugar (brown is recommended but white is great too) not icing sugar , mix it into a paste like consistency , use your fingers to masage the scrub into your lips leaving it for 2-5 minutes, clean off with wet cloth, make up wipe or simply rinse off follow with lip balm/vaseline or lip butter.You can do this as often as possible but not more that twice a week, fix it into your weekly routine and you will see your lips transform as this will make your lips smoother and a bit pinkish. To avoid it going rancid buy a small bottle of extra virgin olive oil (recommended) so it does not waste or store it in the refigerator. I recommend virgin olive oil, pure coconut oil and organic unprocessed honey so you can easily avoid irritation that might spring up from using chemical infused products. You can also use jojoba oil or vitamin E oil.
Use a seperate toothbrush to exfoliate on the go. Take a new soft toothbrush and make it a bit damp or apply a thin layer of vaseline on your lips and use the brush in soft circular motion to scrub off dead skin cells. It is importantto use a different toothbrush so you do not transfer germs fro your mouth to your lips. Some people actually do this imediately after brushing with the same toothbrush as it works better for them, they still have that tingling feeling from brushing on their lips so they just mildly scrub their lip with it (since the lip is damp already) and rinse everything. great way to multi task but probably not the best. You can use the tooth brush method before applying the homemade scrub above or any other scrub. Moisturise with your favourite lip balm afterwards.
Baking soda might not just be for baking alone. Mix a little baking soda with little water to form a gritty paste, apply with a soft toothrush ,rinse off and follow with lip balm.
Avoid licking your lips very often. This is a temporary but bad solution to chapped lips. Saliva contains acid that dries out the lips so the more you lick your lips the more they dry out as the enzymes from the saliva can break down the skin protective barrier. Use a lip balm on the go instead.
Drink lots of water to keep your lips and body hydrated. This is an inside out solution, the more refreshed you are the smoother your lips will be. Sometimes no remedy can save your dry lips save a bottle of water, it is important to note that sparkling water might not be the best option as they tend to dry out lips too. I for one have experienced it drying out my lips due to the fizz but if your water must be sparkling then go for it by all means, just be observant on the effect on your lips.
Unrefined shea buter can be great for hair and skin so why not the lips too?! My friend once gave me a tip on how she moisturises with shea butter before putting her lip stain on and I thought hold on..If it can moisturise the skin and hair why not the lips. Shea butter has so much benefit due to its high fat content (healthy fat by the way) and vitamins. The raw unrefined and unbleached ones are the best to go for. They can literally weather any storm lol and keep your lips hydrated and protected (due to little spf content) from dry cold irritating weather, sometimes my lips feels better with shea butter than some expensive lip balms. If you have nut allergy then I advice you stay clear of this as it contains shea nuts , it is a great lip product but not to be used often if you always lick your lips as it is recommended for external use only.
How to use? Just massage into lips before putting on lip product or leave it bare.
Vaseline is naturally made for dry chapped skin of any kind and they even went further to make the ones for lips , lip therapy with different flavours including creme brulee that can be an absolute delight for kids and marmite for vegetarians , it comes in a pocket size too! It does not get better than that does it?! I can truly say my lips have seen better days during winter as a result of this product.There are so much to choose from in the vaseline range currently, from lip balm in tubes and sticks to therapy gloss in little vaseline jars even bedazzled ones and then there is this tin container that comes in a bigger tin which is my absolute favourite for days, I love and will always love the cocoa butter as it has saved my lips from tearing during winter. Vaseline has a special formula that aids water retention and trust you need all the moisture locked in your lips to prevent it from cracking. Buy a pocket size and rub as often as needed on the go and you can also use some for dry flaky hands.
Stay away from processed sugar. Have you ever wondered why you get this dry thirsty feeling at the corners of your mouth after that chilled bottle of coke? Processed sugars. Anyone that suffers from dry skin and lips should avoid anything that contains high amount of processed sugars as the dry out the lips too.This is another inside out solution but one you should avoid, take lots of water instead.
Lip balm basically comes in different kinds , shapes , sizes , flavours , colours, makes and solutions. There are some healing lip balms for chapped lips in the market but besides that lip balms are temporary but relevant solutions to dry lips. If you suffer from extreme chapped lips then look out for lip balm with content high in vitamin E, jojoba oil, shea butter, aloe vera , butter etc.
Not everything matte. Yes everyone is on about the mattiest of matte lipstick and lipstain and you quickly rush to buy knowing that you suffer from cracked lips. Matte lippies and cracked lips will forever be at war with each other, if your lips are not properly moisturised and cracked chances are trace of lipstick will settle into cracks making it look cheap,uneven and hard to get out. While treating chapped lips go for nude coloured lipglosses and moisturizing lipsticks like milani(they are very creamy , pigmented and moisturising) and stay away from dark colours as they make cracks visible. No matter how smooth your lips are, always moisturise befor applying any lip product so the lips stay supple and keep the product on, treat chapped lips and moisturise very often or you can use the shea butter technique my friend uses, then you can go join hashtag matte lippie crew.
Is my best lip product destroying my lips? Store bought lip balms and treatments are the best, smell great and good to your pocket too, there is also this feeling of belonging when you have that strawberry balm everyone raves about. You have tried almost all the remedies but nothing is working, maybe it is time to check the contents of your lip balm, glosses and lipsticks as what is good for the gander might not be good for the goose. If you find out your lips are not getting the best moisturisation out of a product you feel should deliver then please try something else and also track the ingredients of what you put on your lips to see what you react to. Some chemicals used to make lip balms these days can do more harm than good, I guess that is why home made lip balms is a growing trend.I have bought lip balms people swear by in terms of moisturisation and smoother lips but it does absolutely nothing for me, instead my lips feels like I have dried oil on it. Don't we all fall for the hype *sigh*
Form a habit of moisturising before bed.Make up wipes are used most times to take lip products off and they can leave a drying effect, even if you do not use make up wipes or any make up remover, moisturising your lips before bed time is great to keep the lips soft and supple.
Keep a chap stick, shea butter or lip balm by you and moisturise as often as needed especially after constant kissing as exchange of saliva can dry out the lips.
Avoid peeling or tampering with your lips. One thing I noticed is that people that suffer from cracked lips tend to peel off the dead skin cell *cringe* even I do it and it can be more painful than a paper cut! No matter how tempted or irritated you feel at the sight of loose dead skin cell do not peel your lips especially when dry as this will worsen the case, peeling it off beyond the dead skin cell that has come off can bruise you exposing you to bacteria, massage lip balm ,vaseline or shea butter to soften the dry dead skin cell and gently peel off if you must or else I recommend you use a lip scrub gently instead.
E.L.F has made it very easy by producing an affordable lip exfoliator that removes dry skin cells. I love e.l.f products so I am guessing this is a great buy, the reviews are outstanding and I read the ingredients includes shea butter,Vitamin E , avocado , grape and jojoba oil. What more do you want from a lip product? Oh did I mention you can get it for 3 bucks or 4quid 50? Talk about a bargain ey.
Mary Kay is no exception in term of making lip scrub easier than ever.If you suffer from chapped lips then try the Mary Kay satin lip set, this set is a miracle worker ! it comes as in two tubes one as a lip scrub and the other as a balm. The lip scrub is applied like a lotion on the lips and masaged with soft srub motion, you will literally see the dead skin cells coming off and all you have to do is clean off everything with a damp cloth and apply the lip balm after wards. This is part of my lip preparation regime although I am not to keen about the lip balm, its great but it just doesn't cut it for me , I prefer when my lip balm sinks in and leave a buttery smooth finish as opposed to a glossy finish, I love love the satin feeling the scrub gives me, the tube is so cute and nothing can be wasted as it comes out little.
Some people suffer from extreme chapped lip and I reccommend you see a specialist for that, they might recommend something that will definitely work,maybe a herbal ointment or something to treat the lips and stop it from bleeding and intensive chapping. The last thing you want to do is wing it introduce foreign chemicals into bruised lips.
Hope this helps.
Thanks for reading.
Chapped lips can be frustrating and embarrassing but there are simple ways to reduce the appearance of dry cracked or chapped lips.
Use olive oil/coconut oil/honey and granulated sugar mix as a light lip scrub. This can be a long term solution for dry and rough lips.The sugar is known for sloughing dead skin cells away and the olive oil for proper moisturisation , the coconut oil also helps in proper moisturisation and healing burns.
Mix half teaspoon of olive oil with one teaspoon of granulated/ground sugar (brown is recommended but white is great too) not icing sugar , mix it into a paste like consistency , use your fingers to masage the scrub into your lips leaving it for 2-5 minutes, clean off with wet cloth, make up wipe or simply rinse off follow with lip balm/vaseline or lip butter.You can do this as often as possible but not more that twice a week, fix it into your weekly routine and you will see your lips transform as this will make your lips smoother and a bit pinkish. To avoid it going rancid buy a small bottle of extra virgin olive oil (recommended) so it does not waste or store it in the refigerator. I recommend virgin olive oil, pure coconut oil and organic unprocessed honey so you can easily avoid irritation that might spring up from using chemical infused products. You can also use jojoba oil or vitamin E oil.
Use a seperate toothbrush to exfoliate on the go. Take a new soft toothbrush and make it a bit damp or apply a thin layer of vaseline on your lips and use the brush in soft circular motion to scrub off dead skin cells. It is importantto use a different toothbrush so you do not transfer germs fro your mouth to your lips. Some people actually do this imediately after brushing with the same toothbrush as it works better for them, they still have that tingling feeling from brushing on their lips so they just mildly scrub their lip with it (since the lip is damp already) and rinse everything. great way to multi task but probably not the best. You can use the tooth brush method before applying the homemade scrub above or any other scrub. Moisturise with your favourite lip balm afterwards.
Baking soda might not just be for baking alone. Mix a little baking soda with little water to form a gritty paste, apply with a soft toothrush ,rinse off and follow with lip balm.
Avoid licking your lips very often. This is a temporary but bad solution to chapped lips. Saliva contains acid that dries out the lips so the more you lick your lips the more they dry out as the enzymes from the saliva can break down the skin protective barrier. Use a lip balm on the go instead.
Drink lots of water to keep your lips and body hydrated. This is an inside out solution, the more refreshed you are the smoother your lips will be. Sometimes no remedy can save your dry lips save a bottle of water, it is important to note that sparkling water might not be the best option as they tend to dry out lips too. I for one have experienced it drying out my lips due to the fizz but if your water must be sparkling then go for it by all means, just be observant on the effect on your lips.
Unrefined shea buter can be great for hair and skin so why not the lips too?! My friend once gave me a tip on how she moisturises with shea butter before putting her lip stain on and I thought hold on..If it can moisturise the skin and hair why not the lips. Shea butter has so much benefit due to its high fat content (healthy fat by the way) and vitamins. The raw unrefined and unbleached ones are the best to go for. They can literally weather any storm lol and keep your lips hydrated and protected (due to little spf content) from dry cold irritating weather, sometimes my lips feels better with shea butter than some expensive lip balms. If you have nut allergy then I advice you stay clear of this as it contains shea nuts , it is a great lip product but not to be used often if you always lick your lips as it is recommended for external use only.
How to use? Just massage into lips before putting on lip product or leave it bare.
Stay away from processed sugar. Have you ever wondered why you get this dry thirsty feeling at the corners of your mouth after that chilled bottle of coke? Processed sugars. Anyone that suffers from dry skin and lips should avoid anything that contains high amount of processed sugars as the dry out the lips too.This is another inside out solution but one you should avoid, take lots of water instead.
Lip balm basically comes in different kinds , shapes , sizes , flavours , colours, makes and solutions. There are some healing lip balms for chapped lips in the market but besides that lip balms are temporary but relevant solutions to dry lips. If you suffer from extreme chapped lips then look out for lip balm with content high in vitamin E, jojoba oil, shea butter, aloe vera , butter etc.
Not everything matte. Yes everyone is on about the mattiest of matte lipstick and lipstain and you quickly rush to buy knowing that you suffer from cracked lips. Matte lippies and cracked lips will forever be at war with each other, if your lips are not properly moisturised and cracked chances are trace of lipstick will settle into cracks making it look cheap,uneven and hard to get out. While treating chapped lips go for nude coloured lipglosses and moisturizing lipsticks like milani(they are very creamy , pigmented and moisturising) and stay away from dark colours as they make cracks visible. No matter how smooth your lips are, always moisturise befor applying any lip product so the lips stay supple and keep the product on, treat chapped lips and moisturise very often or you can use the shea butter technique my friend uses, then you can go join hashtag matte lippie crew.
Is my best lip product destroying my lips? Store bought lip balms and treatments are the best, smell great and good to your pocket too, there is also this feeling of belonging when you have that strawberry balm everyone raves about. You have tried almost all the remedies but nothing is working, maybe it is time to check the contents of your lip balm, glosses and lipsticks as what is good for the gander might not be good for the goose. If you find out your lips are not getting the best moisturisation out of a product you feel should deliver then please try something else and also track the ingredients of what you put on your lips to see what you react to. Some chemicals used to make lip balms these days can do more harm than good, I guess that is why home made lip balms is a growing trend.I have bought lip balms people swear by in terms of moisturisation and smoother lips but it does absolutely nothing for me, instead my lips feels like I have dried oil on it. Don't we all fall for the hype *sigh*
Keep a chap stick, shea butter or lip balm by you and moisturise as often as needed especially after constant kissing as exchange of saliva can dry out the lips.
Avoid peeling or tampering with your lips. One thing I noticed is that people that suffer from cracked lips tend to peel off the dead skin cell *cringe* even I do it and it can be more painful than a paper cut! No matter how tempted or irritated you feel at the sight of loose dead skin cell do not peel your lips especially when dry as this will worsen the case, peeling it off beyond the dead skin cell that has come off can bruise you exposing you to bacteria, massage lip balm ,vaseline or shea butter to soften the dry dead skin cell and gently peel off if you must or else I recommend you use a lip scrub gently instead.
E.L.F has made it very easy by producing an affordable lip exfoliator that removes dry skin cells. I love e.l.f products so I am guessing this is a great buy, the reviews are outstanding and I read the ingredients includes shea butter,Vitamin E , avocado , grape and jojoba oil. What more do you want from a lip product? Oh did I mention you can get it for 3 bucks or 4quid 50? Talk about a bargain ey.
Mary Kay is no exception in term of making lip scrub easier than ever.If you suffer from chapped lips then try the Mary Kay satin lip set, this set is a miracle worker ! it comes as in two tubes one as a lip scrub and the other as a balm. The lip scrub is applied like a lotion on the lips and masaged with soft srub motion, you will literally see the dead skin cells coming off and all you have to do is clean off everything with a damp cloth and apply the lip balm after wards. This is part of my lip preparation regime although I am not to keen about the lip balm, its great but it just doesn't cut it for me , I prefer when my lip balm sinks in and leave a buttery smooth finish as opposed to a glossy finish, I love love the satin feeling the scrub gives me, the tube is so cute and nothing can be wasted as it comes out little.
Some people suffer from extreme chapped lip and I reccommend you see a specialist for that, they might recommend something that will definitely work,maybe a herbal ointment or something to treat the lips and stop it from bleeding and intensive chapping. The last thing you want to do is wing it introduce foreign chemicals into bruised lips.
Hope this helps.
Thanks for reading.
Beauty begins the moment you decide to be yourself; Coco Chanel
''Proverbs 3:15; She is more precious than jewels, and nothing you desire can compare with her''
Saturday, 17 October 2015
Graduation outfit ideas for ladies
Hello! If you read my previous post you will see some tips on graduation, planning efficiently and having a hassle free day on your day of graduation. In this post I am giving suggestions for ladies outfit, hope you enjoy.
When outfit is mentioned we all think about dress, accessories, shoes sometimes even hair and make up is not excluded.
The dress: Choosing a dress might just be as easy as abc and can keep you comfortable if certain rules are followed.
Dress for a graduation ceremony should be shape flattering or elegantly loose, very tight clothing is not the ideal outfit and here are the reasons why: they can make you bulge in your photos and we all know as ladies that is very unflattering, even if you feel the gown will cover the dress how about comfort? a graduation ceremony can go on for hours and the last thing you want is discomfort from a dress that is so tight you can hardly breathe in, very tight dress restricts air and blood flow, keeping it on for a long time can do some temporary damage or cause you to gasp for breath or even faint. This is not the occasion for bare chest or very low v neck that will spill lot of breasts/cleavage, keep everything packaged and decent to avoid nip slips because that is not good for photo day lol remember your friends and families are there and trust naija mother wee just cover all that spillage with handkerchief and it must stay there during photos and in the graduation ceremony, every awkward situation should be avoided by all means :p.
Go for jumpsuits, 2 piece suits, long elastic stretch skirt,lace two piece, flare skirt/gowns, ruched medium length dresses, tailored trousers, even dinner/fancy gowns but not floor length, long sleeve, chiffon tops and if you are still bent on showing off your bod and shape then try a body con or bandage dress,these dresses come stretchy and are elastic so they are bearable even if they are tight, choose one that would go below the knee because due to the elasticity they go up every five to ten minutes causing you to pull them down they are also more flattering when longer.

Bright gowns go well with dark dresses but this is not a rule, tights are also great for dresses above the knee.
Culled from Anne Jeffrey.


 Bright colours will go with your gown too, you can wear a blazer or leather jacket over this if winter is around the corner.

stylesbyodi.

High waist flare trousers are back and they are sexier than ever. Pair this with a more corporate shirt or off shoulder lace top a clutch and chunky or minimal accessories.

Twining on their outfits, aren't these ladies gorgeous?! Look at the pop of colour with their shoes.love! By Toluwane and Chinunam


Elegant,bright and simple!. Culled from hercampus.
Shoes: This might sound bizzare but on your graduation ceremony stay clear of very high heeled shoes of any kind. You want to feel powerful and poised when matching across that podium to get your award/certificate and there is nothing as supporting as a great pair of shoes, wearing heels you can't walk with won't give you that support and there is a possibility you will trip, you do not want that to be the highlight of your day and trend online too.

We all love our 6 inch babies and want to wear them at all cost, us girls love to stand out and that is okay but not at your own discomfort, we all know we can wear our heels for a particular amount of hours and after that we get very uncomfortable, very high heeled shoes increases that pressure and you might do a lot of walking during your ceremony from meeting family and friends to posing for pictures and collecting your certificate.
Shoes should be taken seriously as they are one of the things that stand out of that whole big gown covering everything, while choosing shoes you will worry about what others will wear and if your shoes will stand out but let me be honest, everyone is focused on their day and might take a minute to notice so choose your heels for yourself. You will get away with bright colored heels, skin and even fur designed shoes.
Bear in mind that high heeled shoes are not the only flattering shoes, if your shoes are beautiful and fit perfectly they will stand out. You can wear flats,ballets sandals, kitten heels, classic pumps,ankle boots and medium length boots with tights, shoes with strap are perfect as they elongate your legs and give your feet something to hold on to, chunky heeled shoes and wedges are very comfortable because of the balance they give, your shoes must not be boring because you are trying to look coperate in fact this is the one accessory you can style up, the shoe color must not match your gown's and they can come with bows,jewelry chunks,bedazzled anyhow you want!. The inevitable is possible so keep the very high heels at bay, classic and elegant pumps are in season right now you can try them.

Break into new shoes a day before or put a glass coke bottle in it to expand it, avoid peep toes if you can't handle them for long and do not forget to take a little walk with your shoes to remove that new shoe sole that can be slippery, you can also scratch the underneath your shoes with a nail file for easy friction. If you had an accident or something happened with your foot before the big day then no problem things like this are inevitable, if you cannot rock heels then rock your flats honey just do what you are comfortable with. Avoid big chunky winter boots,clogs, wellies and over the top experimental heeled shoes.

Classic stylish shoe. Note these shoes can actually hurt after a while because of the sole design so be careful

These boots are just perfect! especially for winter grad season. stylish,comfortable and if fur lined or suede inside it is warm as well.


Strap shoes/sandals will hold your feet and make them steady and easier to walk in.
Accessories are great to play with too! Time to bring out your pearls, rings, necklace, watch, beads and all that jeweled goodness.

Match chunky necklace with your wrist accessory, avoid pairing very chunky full necklace with very long and bold earrings because the gown is fitted in a way where it comes over your neck so very chunky jewelry can disrupt that and make it bulge and you don't want to look like a Christmas tree too. You can either be bold or elegant with your rings, stack rings and tassel rings are so right now and they go with literally any outfit. Match dark colored accessories with bright clothing and vice versa.
Keep your nails(toes and fingers) trimmed, clean, fixed or fully polished, you either wear nail polish or you don't, chipped nail polsh happens to everyone but it is far from sexy. If you get your nails done days before and you do not want them to chip, use some apple cider vinegar pressed on a cotton wool as base coat that way your nail polish will last longer.

stack rings are so right now,try them.
Hand / clutch bags come in handy during graduation, most people match their clutch with their shoes although it is not a must. Pack your phones, money, sanitary pad/extra tampon if needed( be careful when you open your bag though), pocket tissues/handkerchief, powder compact for touch up, lipgloss/balm/stick, handcream, scruchies/hair bands, bobby pins to keep your hat or hair in place, identification card, business card,pen and paper. You can pick from any of these especially the ones that are necessary. I am sure some are wondering why business card or paper? A graduation ceremony is a place where you will meet many dignitaries, employers and people looking to do business, so be prepared. It is very important to look your best as most employers come to graduation ceremonies looking for potential employees, there is nothing that speaks volumes like appearance, do not throw an amazing opportunity just because you need to show some skin.
Laid down locks are best for a graduation hat, if you like ponytails keep it low as high ponytails will make your hat wobbly and painful to put on.,the hat won't even stay put. No jazzing or bedazzling of graduation hat if you will return it back to the school or else you will pay extra charges. You can dazzle it up if you bought it or for a different look try a piece of african print/ankara round the edges to match your africant print or any dress.
Make up should be fresh, clean and nude. This is not the best place for goth lips or blue lip, they are very creative but the highest you should go in terms of color is a red or light purple lip gloss/stick. Pair smokey eyes with pink/nude lips or create nude eyes with winged liner with ombre berry lips.
We are done with the hassle of graduation, its time to let your hair down or up!!! Firstly you can decide to keep your gown on for some fun but that is not the best due to stains,spills and potential hazards and you want to let loose! from the dress I mean :p. Anyway bring out the heels, bandage dresses and celebrate your night responsibly, you do not want bad pictures to surface online from your last day of school. I wish you all the best and I hope you learnt something from this post.
'' Always be beautiful in your own kind of way''
Facebook: Fabbydeinma
twitter : @fabbydeinma
gmail: fabbydeinma@gmail.com
Youtube : fabbydeinma
Instagram: @fabbydeinma
IMAGES FROM GOOGLE AND FRIENDS.
Thursday, 24 September 2015
Graduating soon? Get in here then!
Its graduation season and I start off with a big congratulations to all those graduates, graduates to be and soon to be graduates,I wish you nothing but the best in your future endeavors with hope and prayers that you find what you seek for. May God guide your path, please do good with what you have learnt and your talent for it will help the world be a better place and you too.
Remember, you owe it to yourself to make the rest of your life the best of your life no matter the setbacks or mistakes.
Its your big day and you have probably spent all your school years dreaming of this day but what you should realize is anything can go wrong hence you need to plan properly and that is what this post is about.Please keep in mind some graduation ceremonies takes place in the evenings too so try and alter some tips to it.
Preparation is paramount and should be given priority above everything else as it sets the pace for other t hings to fall in line. Like the saying goes ''if you fail to plan then you plan to fail'. If you love procrastination then this is not the place to apply such as you will leave a lot of important things out. To be prepared plan your activities and duties ahead of time, this includes getting all your documents ready ahead of time in case the school needs them e.g your past results,clearance,id card,registration number etc. Be specific on what you want for your ceremony also make a to do list months or weeks before but I assume you might have exams to even be thinking of grad at that period but if you remember anything write it quickly. Most institutions give students time to prepare for graduation so use this time and make your list,checking them as you go along. First tip to get prepared is book things ahead of time and things you can possibly book are listed below;
Gowns and payments: I know you can't book payment but you can book things early with payments. After getting all necessary documents it is important that you pay for everything that needs to be paid for so you can book an early space and get that out of the way. Book your graduation gown if you need to or pay as early as possible if you need to. Keep all your receipts and photocopies intact so you can provide them immediately if there is a need for it.
Pictures : Most institutions expect students to book pictures at or before the graduation ceremony which comes free or requires payment. Sometimes it is fun using a school photographer as they have been in the business very long and they have most of the props needed for a good picture. You can also book a photographer but this might not be cost savvy , if this is the case and you prefer taking one when you get to the ceremony my advice will be to always take one immediately you get there all fresh, prim and proper. Photographers have enough time to take several shots at the start as most graduates are still on their way so you have time to get a proper picture taken. My advice will be (especially for my naija people) is to haggle price first before picture o or else photographer will over charge you.lol Haggle the price of different packages e.g framing,large picture and all that before taking a picture so you can make proper yanga and leave :p or sometimes the opposite might be the best, haggling after the picture is taken whatever the case just haggle and if you can't then let mother step in you will be surprised at the magic that will take place hahaha. Hire a photographer or buy your pictures after the ceremony, photographers take pictures of every graduating student on the podium and during the walk in. The most important pictures are the ones with family/friends/tutors, personal picture and certificate collection, once you have these you are sorted, all other ones are luxury. Most importantly no matter how many photographers you book or feel will take your picture, get your family and friends to be on standby to capture great moments,this is a good fallback and you might just prefer theirs.
Tickets and family arrangements should be booked on time: Some Institutions let you book tickets for you and your family members online, some have limited number of tickets for who you are allowed to bring along say; 2 tickets/family member per graduate. These tickets (for family members)sell out very fast so book them on time and if anything unexpected comes up and they can't make it, sell your tickets at a reduced price as there are always lots of students looking for sold out tickets or if you do not get yours on time then check for those selling tickets too. Make arrangements for your family/friends if they are travelling down so they can be comfortable ,brief them on what they need to do when they come, where to sit for those who you booked tickets for and those you didn't and if you want to take pictures with them at the start or end, most often than not our friends and family show up and do not know where to sit because we are either so busy we are not present or we are trying to sort things out last minute. Your family /friends are willing to ease your burden so let them handle things they can but make sure they enjoy themselves too.
Entertainment: We all love to do something extra special and celebrate important days with food,drinks and confectioneries and graduation is a ceremony that is no exception . Entertainment for your special day can be done in different ways,most of which I will list and you can choose which is best for you.
Dining: This includes going to a restaurant,diner,pub,buffet etc. The idea behind dining is that there is no hassle of cooking and making sure all things are in order, the only thing you might have to do is simply book your restaurant and tables before the day so the restaurant can plan ahead. This is not necessary but it is a safe way to go as most restaurants might be booked by other graduating students or other events, when booking it is better to book extra tables than the exact amount of guest you are expecting (unless you are paying per booked table). Taking your guests out is hassle free but might just be the most expensive form of entertainment because you cannot control your guests order unless it's a buffet or it is pay for yourself situation (my naija people will not understand this one, pay for yourself Ko pay for yasef ni, I wee just buy rice and eat at home,this method of pay for yourself will not work in naija as it is not our thing so take note).
Catering: could be cooking by yourself or hiring a caterer or family and friends to do the job. It is always best to book ahead of time, stating what exactly you want and working in accordance with your budget. Communicate your preference with your caterer /whoever is cooking for you. Let them know if you will like jollof/fried/white rice, type of sauce, do you want moin.moin (beans pudding) , should the protein be beef chicken egg goat etc, plantains, peppersoup,salad/coleslaw, small chops/finger food(includes samosas,buns,puff puff,chin chin,pastry rolls of any kind,meat pie of any kind, cheese and fruit kebab or any kebab) sandwiches, alcoholic or non alcoholic drinks or both and the list goes on and on. Make your budget known and discuss with the caterer what he/she can do for you if you are way over your budget, for example a small change like moin moin with no egg, choosing just one protein, no coleslaw or salad can make a big difference in the budget, make sure you haggle well and also remember to always keep vegetarians on mind when planning any event at all.
You must have read that catering bit and said to yourself, "why don't I just go to asda love,betcha I could feed 40 people with a tenner". No problem! Organizing a dinner can also be easy and cost effective doing it yourself but let me warn you the hassle and stress!! Wooh!. When organizing your own entertainment /dinner it is advisable to buy everything ahead of time and if you want to cook then do that and preserve it for later. Another thing you could do is use the help of family or/and friends to help you with preparation or setting of tables while you are having your ceremony.
If you cannot be bothered about all the above then you can go the simple way; Pizza!! Yes! take out,good wine and company is a great combo! and all you need is probably a phone call away.
Some institutions provides food for graduates and if this is the case then that is good.
Cake:There is a saying that a get together without cake is like a meeting so I am guessing that might apply here I put the word might as this is not necessary.Having a cake to celebrate is a luxurious choice. It is great ,sweet and you get to write your name on a juicy dessert! Like food this should be booked very early too with details and possibly pictures of what you want.
Souvenirs are a great part of keeping graduation memories in your mind your classmates' and friends minds. We love making these in Nigeria to give out during graduation, it includes books, pens, cups, plates, pens etcetera. In terms of booking,souvenirs are very flexible as it can be booked and done before time. Use a great picture and try out one print out before deciding on the rest of the print out so you do not get disappointed.
Book a sitter: Do you have a baby/babies and need them looked after during your ceremony? book a baby sitter or ask the help of a friend/spouse/family member ahead of time. If you are still breastfeeding then pump before the ceremony and give it to the sitter, don't forget to pack diaper,cloth bags and all.If a sitter might disappoint or you do not agree with the idea then look for a close by daycare or one run by the institution and also state your concerns to the authority of the school about the care of your baby if they do not run a daycare. Babies get very restless and bored and this might be the case during the ceremony and if your baby fidgets or start crying you cannot concentrate on the ceremony a 100%,
Pregnant graduate: If you are heavily pregnant or just generally pregnant I advice you notify the institution and make arrangements for your needs. Sitting close to an exit is safe as you can go out easily in case you need to.
Disability graduates: Make all plans with your institution and let them know your situation so they can cater to your needs to your utmost comfort.
Beauty regime: Consists of make up, hair, nails, tan, teeth, eyes and all that hassle we love doing to look beautiful and appear all glam. Any beauty regime should be booked and done on time, some might need to be done days before your graduation and some on that day. I am a make up artist and over the years I have had experience with last minute bookings literally and I have no problem as these things come up but my advice is that you give your make up artist time to get your face properly done and your stylists too. For those that want sew ins, corn rows and any hair that might be a bit painful get it done a week before so your caps do not hurt,hair cuts should be done a bit early too and for my gals that love a tan glow for that day, it should be done days before so there are no transfers or stains. No matter how lovely you want to look just be safe and do what suits you.
I hope you guys enjoyed this post and learn a thing or two. Once again congratulations!
Be sure to check my youtube page: fabbydeinma
For make up bookings contact me at : fabbydeinma@gmail.com.
''Psalm 51:17 : The sacrifices of God are a broken spirit: a broken and a contrite heart, O God, thou wilt not despise''
Saturday, 12 September 2015
Fixing false lashes tutorial
There are so many mistakes I have made while trying to fix or put on falsies and over the years I have learnt certain tips and tricks that will not only make your artificial lashes look natural but also make them stick longer and appear great with your eyes.
False lashes have been around before I even knew how to apply make up :p. Whoever brought it up must have been a really clever chap because this eye accessory is essential when creating a smashing eye look. Lashes are one make up essential that will never ever go out of style, every day new inventions and types of lashes are brought into the make up world and they sell like crazy! There are diferent types of lashes to suit everyone needs. This ranges from the natural to over dramatic,whatever you are going for there is an eyelash for it. Lash extensions come in varieties, they can be placed strand by strand on the eyes or stacked up on a band to create strip lashes. The strip lashes are the ones I am focusing on.
Strip lashes are one of the easiest dyi false lashes one can go to. It is time saving, inexpensive, comes in a whole lot of varieties and can be made to fit the eyes. They come in two forms; natural and syntethic. The natural ones are made from softer and finer hairs and made to look as natural as possible, the bands of these lashes are very thin and fine making it easier to sink into your own lashes hence looking natural and almost like your own.They are very light and can be re used for months if properly taken care of. Synthetic lashes are made with soft but thicker hair strands and fibre.The lash bands are very visible making it noticeable.However,if you follow my tutorial,you will know how to make it work for you. There are varieties of synthetic striplashes and they are the best to go for when you want a full lash without stacking up lashes. They are firm and stick well with the right adhesive.
Below you will find tips and tricks to applying falsies. We all love accessorising our eyes to look beautiful and smashing so below you will find tips and tricks to getting your falsies rightly attached.
I have mentioned a few tips in my video here and these are just a few more that will help.
Cut lashes to match your eyes and fit well to your eyelashes; Extra lash band showing at the end of the lashes is not flattering and if you don't cut it,it will stick on the eyelid/skin and will be very uncomfortable, tugging your skin whenever you blink. Cut lash hairs too very carefully if they are too long or full.
It is neccessary to use lash glue; like I mentioned in the video you have to splurge on lash glue so that way the hassle of falsies sticking on will be little to none. Most false lashes come with lash glue and they stick on perfectly well, if you fix lashes on a regular then buy good lash glue bottle or tube that will last for a while,let the ones that come with falsies be a fall back. Do your research before buying any lash glue and for my glasses wearers always check the contents of the glue and choose the one with little to no harsh ingredients as many lash glue tend to contain substances that can irritate the eyes. Duo, ardell strip lash adhesive, lash fix and elf glue( comes with falsies) are the good ones I have used so far that I recommend, check the tutorial to see which I am sticking with. I know most falsies say lash glue are already on the lash band and all one has to do is take off the strip and apply, that is not always the case as there is always a high possibility of it not sticking or pulling off after a while,it is important to know that this is not always the case, I am just saying you may need that extra lash glue. Do mention any other glue you have used before(except bonding glue) and recommend below.
Major tip is to let your glue be tacky(sticky or gummy) before you begin sticking them on. Application of falsies with glue still wet is a no no!. Apply glue on a flat piece of clean plastic, possibly the lash glue container,leave it for a few seconds(possibly 60) and if you don't have an eyelash applicator,use a clean bobby pin for application on the lash band as it is already tacky,blwo for a few seconds and apply. If you applied the glue on the lash band, leave it for a 30 or more seconds while wriggling the lash around to suit your eyes and stick it on. Hold it for a few seconds while adjusting and let go.
Mascara is necessary when applying false lashes; Use the same colour of mascara as the false lashes you are putting on. Apply mascara before sticking the lash on, this makes your natural lashes appear fuller and bring them out so the lash band of your false lashes can stick easily.No matter how much of a hurry you are in this step is very necessary or else there will be a colour difference between your lashes and the artificial ones making it look very fake.
After application press natural and artificial lashes gently to merge and use some mascara to finish off. If you are using bedazzled or jeweled lashes be careful not to stain the jewels with mascara.
There are numerous types of lash glues; dark toned, white and very clear. The dark ones comes out in dark fluid almost like bonding glue but darker and thicker, this glue is great for when you do not want an ounce of glue to be visible on the lashes and even if it smudges it can be easily covered up with eye liner. White glue is white liquid/adhesive, most of them comes in white form but dries in clear /transparent form. No matther where this stains or smudges it will dry clear leaving little or no marks. The diffrence between both is that the clear one might need some eyeliner when you are done while the black make the lids appear darker and it is kinder to making the eyes look like eyeliner is on.
As the name implies,clear glue is very transparent and dries clear like nothing is on the lash band. The elf glue I got came in that form
Reapply eyeliner to straigthen any smudge or where the lashband covers.
When sticking your falsies, make sure you fix it as close to your natural lash line so there is no demarcation. Apply the glue on the strip/lash band from the beginning to the end bearing in mind that the thicker the glue application the longer it takes to dry, but the thinner the glue the shorter. If the glue is very good,one will not need more than two application of glue to get it to stick.In fact the thinner the glue the easier to manouvre while sticking them on. Take note also that when the glue is very thick and it smudges on the lids, when it finally sticks to the lashes it will keep getting drawn to the lids where the smudge is. Hold the lash firmly in the middle and drag the begining of the strip close to the tearduct and pull the end too. Press firmly to ensure it sticks,coat with mascara on the lashes and lower lash line and you are done.
If you are a beginner in applying false lashes, keep the mirror possibly on your lap so you can look down before application or shut the eyes you are about to put the lashes on ,raise your brows and look in he mirror. If your eyes are open during application, you might be tricked into thinking they are very close to the lashes and when you look down the case may be different and keeping them open increases the risk of getting glue into your eyes and trust me that is not a good idea.
The flip helps sort out demarcation issues: After applying your lashes looking down, leave it for a few seconds and flip your eyes open so this way you can easily spot any demarcations between your natural lashes and falsies, adjust lashes if need be, look down again ,adjust, flip again ,adjust. Don't worry its not difficult as it seems.lol
Hold the beginning or end of the false lash and pull gently to take off strip lashes , try not to tug too much as you risk pulling on your natural lashes from the root.
Keep lashes clean after use and store them properly.
Hope this piece helped. Feel free to comment below.
The secret of beauty is simple. Be who you are. Bobbi Brown.
Love fabbydeinma.
Contact
facebook: Fabbydeinma
Twitter: @fabbydeinma
Instagram: @fabbydeinma
For enquiries:
Gmail: fabbydeinma@gmail.com
False lashes have been around before I even knew how to apply make up :p. Whoever brought it up must have been a really clever chap because this eye accessory is essential when creating a smashing eye look. Lashes are one make up essential that will never ever go out of style, every day new inventions and types of lashes are brought into the make up world and they sell like crazy! There are diferent types of lashes to suit everyone needs. This ranges from the natural to over dramatic,whatever you are going for there is an eyelash for it. Lash extensions come in varieties, they can be placed strand by strand on the eyes or stacked up on a band to create strip lashes. The strip lashes are the ones I am focusing on.
Strip lashes are one of the easiest dyi false lashes one can go to. It is time saving, inexpensive, comes in a whole lot of varieties and can be made to fit the eyes. They come in two forms; natural and syntethic. The natural ones are made from softer and finer hairs and made to look as natural as possible, the bands of these lashes are very thin and fine making it easier to sink into your own lashes hence looking natural and almost like your own.They are very light and can be re used for months if properly taken care of. Synthetic lashes are made with soft but thicker hair strands and fibre.The lash bands are very visible making it noticeable.However,if you follow my tutorial,you will know how to make it work for you. There are varieties of synthetic striplashes and they are the best to go for when you want a full lash without stacking up lashes. They are firm and stick well with the right adhesive.
Below you will find tips and tricks to applying falsies. We all love accessorising our eyes to look beautiful and smashing so below you will find tips and tricks to getting your falsies rightly attached.
I have mentioned a few tips in my video here and these are just a few more that will help.
Cut lashes to match your eyes and fit well to your eyelashes; Extra lash band showing at the end of the lashes is not flattering and if you don't cut it,it will stick on the eyelid/skin and will be very uncomfortable, tugging your skin whenever you blink. Cut lash hairs too very carefully if they are too long or full.
It is neccessary to use lash glue; like I mentioned in the video you have to splurge on lash glue so that way the hassle of falsies sticking on will be little to none. Most false lashes come with lash glue and they stick on perfectly well, if you fix lashes on a regular then buy good lash glue bottle or tube that will last for a while,let the ones that come with falsies be a fall back. Do your research before buying any lash glue and for my glasses wearers always check the contents of the glue and choose the one with little to no harsh ingredients as many lash glue tend to contain substances that can irritate the eyes. Duo, ardell strip lash adhesive, lash fix and elf glue( comes with falsies) are the good ones I have used so far that I recommend, check the tutorial to see which I am sticking with. I know most falsies say lash glue are already on the lash band and all one has to do is take off the strip and apply, that is not always the case as there is always a high possibility of it not sticking or pulling off after a while,it is important to know that this is not always the case, I am just saying you may need that extra lash glue. Do mention any other glue you have used before(except bonding glue) and recommend below.
Major tip is to let your glue be tacky(sticky or gummy) before you begin sticking them on. Application of falsies with glue still wet is a no no!. Apply glue on a flat piece of clean plastic, possibly the lash glue container,leave it for a few seconds(possibly 60) and if you don't have an eyelash applicator,use a clean bobby pin for application on the lash band as it is already tacky,blwo for a few seconds and apply. If you applied the glue on the lash band, leave it for a 30 or more seconds while wriggling the lash around to suit your eyes and stick it on. Hold it for a few seconds while adjusting and let go.
Mascara is necessary when applying false lashes; Use the same colour of mascara as the false lashes you are putting on. Apply mascara before sticking the lash on, this makes your natural lashes appear fuller and bring them out so the lash band of your false lashes can stick easily.No matter how much of a hurry you are in this step is very necessary or else there will be a colour difference between your lashes and the artificial ones making it look very fake.
After application press natural and artificial lashes gently to merge and use some mascara to finish off. If you are using bedazzled or jeweled lashes be careful not to stain the jewels with mascara.
There are numerous types of lash glues; dark toned, white and very clear. The dark ones comes out in dark fluid almost like bonding glue but darker and thicker, this glue is great for when you do not want an ounce of glue to be visible on the lashes and even if it smudges it can be easily covered up with eye liner. White glue is white liquid/adhesive, most of them comes in white form but dries in clear /transparent form. No matther where this stains or smudges it will dry clear leaving little or no marks. The diffrence between both is that the clear one might need some eyeliner when you are done while the black make the lids appear darker and it is kinder to making the eyes look like eyeliner is on.
As the name implies,clear glue is very transparent and dries clear like nothing is on the lash band. The elf glue I got came in that form
Reapply eyeliner to straigthen any smudge or where the lashband covers.
When sticking your falsies, make sure you fix it as close to your natural lash line so there is no demarcation. Apply the glue on the strip/lash band from the beginning to the end bearing in mind that the thicker the glue application the longer it takes to dry, but the thinner the glue the shorter. If the glue is very good,one will not need more than two application of glue to get it to stick.In fact the thinner the glue the easier to manouvre while sticking them on. Take note also that when the glue is very thick and it smudges on the lids, when it finally sticks to the lashes it will keep getting drawn to the lids where the smudge is. Hold the lash firmly in the middle and drag the begining of the strip close to the tearduct and pull the end too. Press firmly to ensure it sticks,coat with mascara on the lashes and lower lash line and you are done.
If you are a beginner in applying false lashes, keep the mirror possibly on your lap so you can look down before application or shut the eyes you are about to put the lashes on ,raise your brows and look in he mirror. If your eyes are open during application, you might be tricked into thinking they are very close to the lashes and when you look down the case may be different and keeping them open increases the risk of getting glue into your eyes and trust me that is not a good idea.
The flip helps sort out demarcation issues: After applying your lashes looking down, leave it for a few seconds and flip your eyes open so this way you can easily spot any demarcations between your natural lashes and falsies, adjust lashes if need be, look down again ,adjust, flip again ,adjust. Don't worry its not difficult as it seems.lol
Hold the beginning or end of the false lash and pull gently to take off strip lashes , try not to tug too much as you risk pulling on your natural lashes from the root.
Keep lashes clean after use and store them properly.
Hope this piece helped. Feel free to comment below.
The secret of beauty is simple. Be who you are. Bobbi Brown.
In the beginning the word already existed.The Word was with God and the Word was God. JOHN 1:1
Love fabbydeinma.
Contact
facebook: Fabbydeinma
Twitter: @fabbydeinma
Instagram: @fabbydeinma
For enquiries:
Gmail: fabbydeinma@gmail.com
Monday, 31 August 2015
Simple but dramatic cut crease make up
Hello, ts me again :p
I just put up a tutorial on youtube showing how to achieve a cut crease eye make up look. I tried to keep it as simple as possible, do check it out and I hope you try it and like it too!. Please subscribe and thumbs up too.
Products used:
Eyes:
Sleek eyeshadow palette -oh so special
Zaron gel liner in jazz
Sleek eyeshadow palette in acid
la girl yeshadow
maybelline collossal volume mascara
random lashes from ebay
ardelle strip lash glue
Lips:
Body shop lip balm in strawberry
zaron lip pencil- cappuccino
zaron lip pencil- wild vine
Drugstore white pencil
Face:
House of tara blush palette
sleek contour kit in medium
Maybelline fit me pressed powder 355 coconut
Contact details
For business enquiries: fabbydeinma@gmail.com
Facebook:Fabbydeinma
Instagram: fabbydeinma
twitter : fabbydeinma
Blog: fabbydeinmablogspot.com
I MAY HAVE QUIT BLOGGING!!!
Sike! I said ''may'' :p
Hello!!!,
I know it has been a while and a lot of people have been wondering why I haven't posted here so much lately. Have I given up blogging, beauty or make up?.... NO ! :P . I have not done any of them, I have been busy hence my absence, I have a lot of topics to blog on but getting them done has become a bit of problem due to technical difficulties, executions and actually getting off my butt to do stuff.lol. However, I would appreciate if you can check out my social media and follow me there because I tend to post a lot of quick beauty stuff and tips there when I am not blogging. I will also appreciate if you all will be absolute darlings and suggest in the comment section or email me on what you will like to see more of. I don't want to blog a ton of stuff and end up reading them by myself :/ as a lot of research practice and thoughts go into my contents so please help a sister to help you too :p.
Thank you for reading and please check out my social media. I have almost all so make your choice hehehe.
Facebook: Fabbydeinma
Twitter: @fabbydeinma
Instagram: @fabbydeinma
Youtube: fabbydeinma
Gmail: fabbydeinma@gmail.com
Psalm 91:1 : He that dwelleth in the secret place of the most High shall abide under the shadow of the Almighty
Tuesday, 28 July 2015
Beauty habits to adopt for clog free skin
Isn't it questionable how we miss out the little significant things that matter? life itself can seem complicated but if you look deeper you will see it is the little things that we ignore that makes so much difference in our daily lives and this includes taking care of our skin. There are simple beauty habits that one could adopt that will help the skin clog free and keep some skin issues at bay, these tips should be constantly practiced hence making it a habit and one has to be patient to
see the effect, even if you cannot see visible signs then atleast adopt it to keep the repercussions at bay.
Wash your face every night: Yes there are times you get back from work,club,party or just hanging and all you just want to do is just throw up your feet and get in some good sleep and just a second into dreamland and reality remember you have make up on which needs washing off.When you go to sleep your body heats up and the pores open up allowing layers of make up to sink into them clogging them and causing pimples,spots etc. Now some good advice my friends! pour water on your bedsheets get on it and roll Voila! clean face and you can go to bed :D.....Nah! get your self off the bed and go wash yo face! heheehe. Taking off your make up can do a lot of good to your skin and help reduce break outs in the long run. Washing your face should be considered as vital as washing your hands, the only difference is that the former is done not more than thrice.Wash your face(and neck)with warm water and a mild shower gel /bath soap in circular motion,massaging it gently to increase blood flow, pat dry with a fluffy or soft face towel, tone(if you do) and moisturise with a good body butter (I recommend vaseline cocoa butter or any good butter from the body shop as they have a way of locking moisture) or your normal moisturiser but let it be oil free. Vaseline petroleum jelly or shea butter and body oils (e.g coconut,jojoba,almond) can be great for the skin in cold weather conditions because they lock in moisture which keeps the skin soft and properly moisturised, even those with oily skin can do this too because moisture is needed. At night when resting the skin has all the time to do some rejuvenation and breathe, wearing make up to bed makes it harder for the skin to breathe and even a heavy wind/cold cannot penetrate through and breeze helps the skin feel refreshed hence reducing appearance of acne, clogged pores. sometimes there is this uncomfortable stress and irritating feeling when you try to go to bed with make up,this is your skin trying to breathe now that you are relaxing, all types of toxins from the air, sweat and dirt from dried sweat can add to the skin inability to breathe freely hence leading to breakout,irritation and clogged up pores.If you travel a lot it is best to take your cleansing soap and shower gels with you,if the shower gel bottles are too big to carry along, you can split them into refillable or disposable bottles making it easier to travel with.Whatever your daily routine, make sure you wake up with clean refreshed skin to begin with in the morning again.
 Sun protection formula (SPF): This refers to the ability of a sunscreen to
block ultraviolet B (UVB) rays, which cause sunburns, but not UVA rays,
which are more closely linked to deeper skin damage. Both UVA and UVB
contribute to the risk of skin cancer(culled from google).Spf is everyone's friend.Sunburn is no one's friend not even for a dark skinned lady. I have heard people tell me and say in general that dark skin people do not need sunscreen or spf. o.O ---> that is basically my expression, because my colour is different does not make my skin any tougher to the extent of not needing spf. SPF is for everybody and it is needed to protect the skin from sunburns and sun damage. I love that many creams and cosmetics have spf incorporated in them these days so basically no matter what you use, you are protected but just make sure it states clearly that it contains spf,usually you can just see it on the top or cover or the ingredient content ''SPF 30'' or contains sunblock,sunscreen or UVA protection. It is important to know that the longer one's exposure to sun the higher the amount of sun protection needed e.g spf 4,8 15,30 etc.
Sun protection formula (SPF): This refers to the ability of a sunscreen to
block ultraviolet B (UVB) rays, which cause sunburns, but not UVA rays,
which are more closely linked to deeper skin damage. Both UVA and UVB
contribute to the risk of skin cancer(culled from google).Spf is everyone's friend.Sunburn is no one's friend not even for a dark skinned lady. I have heard people tell me and say in general that dark skin people do not need sunscreen or spf. o.O ---> that is basically my expression, because my colour is different does not make my skin any tougher to the extent of not needing spf. SPF is for everybody and it is needed to protect the skin from sunburns and sun damage. I love that many creams and cosmetics have spf incorporated in them these days so basically no matter what you use, you are protected but just make sure it states clearly that it contains spf,usually you can just see it on the top or cover or the ingredient content ''SPF 30'' or contains sunblock,sunscreen or UVA protection. It is important to know that the longer one's exposure to sun the higher the amount of sun protection needed e.g spf 4,8 15,30 etc.
Minimise hand contact: This is a thing we all do that is fatal for the face. It is a bit of a pet peeve for me but for some reason when I develop a pimple I find my fingers on my face caressing it :/ and before you know it bam!!! it starts getting dark and I have to leave it to prevent dark permanent scars. If you are a fan of touching your face all the time and caressing bumps or scars, please stop it!. Our hands are major attractions for dirt and bacteria, hence can easily contaminate an irritated pore with bacteria. If you have to apply medication or prescribed remedy on a pimple ,wash your hands and do so.However, minimize hand/finger contact with pimples,fungal infections,skin irritations,white heads.blackheads etc as it can complicate matters. Also, make sure you know what you are dealing with before you begin popping things on your face/body or else liquid from certain infections can lead to further growth and spread.If you cannot resist popping pimples then wait till you can see the white part of it and if you need to scratch because of a rash/irritation the try some methylated and soothing powder and get lots of fresh air, if its chicken pox then try some oat milk therapy here.
Also, make sure you know what you are dealing with before you begin popping things on your face/body or else liquid from certain infections can lead to further growth and spread.If you cannot resist popping pimples then wait till you can see the white part of it and if you need to scratch because of a rash/irritation the try some methylated and soothing powder and get lots of fresh air, if its chicken pox then try some oat milk therapy here. For body or for face?: One important thing to do is separate your body sponges,towel and loofah from your face ones. As vain as this may seem it is necessary because the face is a delicate and sensitive area of the body and must be treated as such.Some people can break out from using hard sponges for their face, if you must use a sponge get one that is made specifically for the face and make sure it is not used or any part of the body or shared with anyone else. Try splurging on a little face wash cloth and soft towel (that won't wash out) for the face and keep it specifically for washing and drying of the face.
 Do not leave out the z's ; I know we all have our daily activities and routines that make us shake our heads with utmost impossibility at the thought of sleep. Some say sleep is a waste of time and one had rather use the time and achieve more..sorry if you want to hop on my train because baby girl loves her sleep!. Now let me tell you,sleep is important! I cannot shout or say it enough.Sleep is needed for rejuvenation of the body,it is good for your health and it is also great for the skin. Believe or not some people develop skin acne and mild skin problems due to lack of sleep so missing out on those vital hours of sleep can lead to mild breakout and can cause dark circles, tired eyes and to mention been stressed too.
 Get some good cleaning products: Washing your face is not enough to take off heavy make up. Wanna put it to test? wash your face as usual after a long day with heavy make up on, take a clean make up wipe and swipe. Did you see streaks of foundation on the wipe? Don't blame your soap.Water and soap are sometimes not enough to take off heavy traces of make up and dirt. Get good toners,cleansers with chemicals that are not harsh(e.g : parabens,fragrance, sulphate,triclosan,dioxane,formaldehyde etc) and if you do not have all those make your own! Try the quaker oats one from here. After face/body wash, clean face and neck with fragrance free make up wipe to take off excess make up and mascara/liners, do not scrub lashes and eyes while washing as this can do more harm than good, instead patiently use the wipe and keep swiping to get rid of traces of mascara and eyeliners. I am sure some are reading this and going thank God I don't wear make up! Nah honey! you need to get in here too.The skin easily attracts dirts while we carry out daily activities, sweat also dries sometimes on the skin and can cause as much harm as leaving make up overnight hence it is important as well to wash ,moisturise, cleanse etc. If you are really lazy to take off make up with water and cleansing gel,then use fragrance free make up wipes to take off make up(not advisable for heavy make up) or massage a good body oil into the skin and use a wet facial cloth.
Take care of your stuff: Clean make up brushes and sponges once or twice every two weeks depending on usage, these items are easy ground for bacteria and germs to breed on and using them while unclean can clog pores,lead to irritations and sometimes infections. Wash brushes with mild shower gels or soap in warm water mixed with antiseptic/disinfectants, put some shower gel in water and swirl to take off dirt or place liquid soap on clean palm and swirl brush till dirt comes off,keep rinsing till no strak of make up comes off in the water. In between brush was you can clean brushes on a tissue with isopropyl alcohol or baby oil.
 Discard
cleansers,creams and soaps that has expired or smells and applies
weird. Take proper care of face towels and don't use hard detergents to
wash them.
Discard
cleansers,creams and soaps that has expired or smells and applies
weird. Take proper care of face towels and don't use hard detergents to
wash them.Two more quick tips are to keep the washing of your face to three times maximum, we all know washing up is good but too much chemicals can strip the face of its natural oils leaving it dry and irritated.If your work status requires you washing your face more tan twice/thrice or you just have a thing for washing your face all the time,then use face wipe in between wash so wash time is reduced. Always carry a small pack of tissues and oil mattifier sheet to clean sweat and shine so you can dispose of them immediately, using handkerchief or towels can breed bacteria that can easily transfer to the face and eyes with continuous usage.If you must use handkerchief/facetowels then keep them clean and remember to wash your hands frequently and sanitize too.
If you have any other tips, feel free to share.
love fabbydeinma
photocredit: fotolia
Plead my cause, O Lord, with them that strive with me: fight against them that fight against me. Psalm 35:1
Thursday, 23 July 2015
Gothic shade of purple make up tutorial.
Hello!
I just put up another make up look on the tube and it was inspired by my zaron lipstick that I got a while back, the lipstick sade is in distinct and me loves this shade of purple! It is versatile ,creamy and stays(ensure you moisturise your lips properly girl! ain't no one got time for cracked lips -_-)
This is the video below, click the link to watch!.I hope you like it, you have the freedom to comment and subscribe.Your suggestions matters.
Products used:
Davis eyeliner/lipliner pencil -001
e.l.f blending brush
sleek eyeshadow in oh so special
l.a girl 10 color eyeshadow palette-Nightlife
drugstore liquid liner
Face:
Mary kay foundation -bronze 507
Black opal stick foundation and concealer -topaz
maybelline pressed powder -355 coconut
marykay creme to powder foundation-bronze 2
sleek contour kit-medium
zaron nude it all palette
Lips :
Mac lip pot-honey
Davis eye pencil
Zaron lipstick-dinstinct
Sleek contour kit-medium
l.a girl eyeshadow palette
Facebook: Fabbydeinma
Instagram: @fabbydeinma
twitter:@miss_deinma
Psalm 103:2 ; Bless the LORD, O my soul, and forget not all his benefits
Sunday, 12 July 2015
Sunday, 28 June 2015
Gel liner hunt
So you all know I have been doing some eyeliner series and I am still on that ,however this might just be the last of them.I might do some more in the future but for now this is where I will stop.
If you read my post from series 1 I wrote a bit about my struggle with gel liners saying how have bought one too many and they end up like a ball of hard rock, so here goes.
These are the few gel liners I have been with so far.lol
 E.l.f studio gel liner: Ah my first lav.Doing all kind of things you do with something you come across for the first time. I was a gel liner virgin when I came across this , naive on what to do with it when it came in the mail and I cannot for the life of me remember why I actually bought this or if I even knew what gel liners were! Maybe I must have read one or two reviews ,I am not sure.However,I remember buying a lot of e.l.f products and this was in it(most of their products are great by the way and affordable).
This gel liner came with its own brush which I used a lot to apply the product. As a make up newbie,I did a lot of things with this liner, it served as a cream eyeshadow,primer and most importantly eye liner. It was indeed creamy and black,however I cannot vouch for its intensity,smudge/water proof or long lasting effects because I was a newbie then and liked that this was different,I just played around with it and did not watch out for those properties. However, people stand by it saying it is legit ,smudge proof, fades a bit but does not budge and most importantly it is pocket friendly! abouts 3 u.s dollar s or 3.75 quid/pounds, it cannot get better than that my friends!. Upside is it comes in so many colours, downside; it dried up quicker than expected,
 Asta Hegai and Esther: This is a nigerian brand that sells tons of good make up stuff. I got the gel liner and use it for my make up practice and I must say I found this stuff pretty wicked! effortless glide, not too creamy though , smudge proof,long lasting, water proof as well and comes with its own brush/applicator. I love the black and brown but I cannot say the same for the other colours,they were disappointing really. I got them at #2500 but you can get them for the same or less online. This gel liner served me well but as usual,most good things must come to a solid end.The black has literally dried up like a rock and sitting on my dresser,still not decided what to do, to use the pot for something else or to try melting it back?.The brown is still in good shape though and of all my gel liners to date,this has been the darkest of them all and my favourite because it ticks most boxes of qualities a gel liner should have..
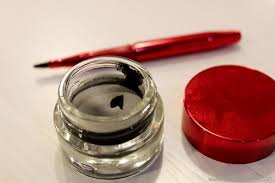 Mary Kay: After my asta gel liner experience. I decided to try something new and a good friend of mine helped me get a Mary Kay gel liner from Lagos and sent it to me. At first glance I smiled from cheek to cheek with final satisfaction that my eyeliner problems have come to an end, I love Mary Kay products and I thought I will come to love this one too but disappointingly I can't:( . It did fool me with its luxurious packaging and applicator but thatsall I find interesting about this gel liner unfortunately. It is so dry! I don't understand, it only glides when I dip the brush into the pot and once its out of the pot that is it! it did not glide on my eye lids, I tried as firmly as I could but it kept forming small balls and flaking and when it finally applied it looks like I had used a blunt eyeliner pencil to smudge my lids. At first, I though it was the brush that made it dry so I switched brushes and the same results, i tried getting the brush wet(maybe somehow it was a cake gel liner I did not know about ) and it came out with nothing! I cannot help but laugh at how funny and off putting it is.It is still very new and I have no idea what to do with it , I don't give up easily on stubborn make up but this one I have almost given up on, I have tried melting it and it will not budge so please if you can help a sister out do so with suggestions or I have no choice but to scrape it off and use the pot for something else :( .It was #2500 by the way.
 Zaron: This is my new buy and a current favourite. I came across their gel liners while I was in love with the asta h&e gellies but I did not really think too much of it.Fast forward to more than nine months later I found my self at casabella and the sales lady had this lovely eye make up,when I asked which gel liner she used she said zaron so I decided to try it out. They were out of stock that day so I ordered online.Their gel liners are pretty amazing.Creamy to almost a fault hence glides easily, it is intense in colour(the black especially) but it travels and smudges. I cannot decide yet if it is water proof but when I wore it all day it faded but still stuck around enough to be noticeable.It does not come with an applicator.
see an intense and descriptive pictorial review here.
follow on instagram: @fabbydeinma
facebook:fabbydeinma
youtube:fabbydeinma
for enquiries: deinmakalio@gmail.com
If you read my post from series 1 I wrote a bit about my struggle with gel liners saying how have bought one too many and they end up like a ball of hard rock, so here goes.
These are the few gel liners I have been with so far.lol
E.l.f studio gel liner: Ah my first lav.Doing all kind of things you do with something you come across for the first time. I was a gel liner virgin when I came across this , naive on what to do with it when it came in the mail and I cannot for the life of me remember why I actually bought this or if I even knew what gel liners were! Maybe I must have read one or two reviews ,I am not sure.However,I remember buying a lot of e.l.f products and this was in it(most of their products are great by the way and affordable). This gel liner came with its own brush which I used a lot to apply the product. As a make up newbie,I did a lot of things with this liner, it served as a cream eyeshadow,primer and most importantly eye liner. It was indeed creamy and black,however I cannot vouch for its intensity,smudge/water proof or long lasting effects because I was a newbie then and liked that this was different,I just played around with it and did not watch out for those properties. However, people stand by it saying it is legit ,smudge proof, fades a bit but does not budge and most importantly it is pocket friendly! abouts 3 u.s dollar s or 3.75 quid/pounds, it cannot get better than that my friends!. Upside is it comes in so many colours, downside; it dried up quicker than expected,
Zaron: This is my new buy and a current favourite. I came across their gel liners while I was in love with the asta h&e gellies but I did not really think too much of it.Fast forward to more than nine months later I found my self at casabella and the sales lady had this lovely eye make up,when I asked which gel liner she used she said zaron so I decided to try it out. They were out of stock that day so I ordered online.Their gel liners are pretty amazing.Creamy to almost a fault hence glides easily, it is intense in colour(the black especially) but it travels and smudges. I cannot decide yet if it is water proof but when I wore it all day it faded but still stuck around enough to be noticeable.It does not come with an applicator.see an intense and descriptive pictorial review here.
follow on instagram: @fabbydeinma
facebook:fabbydeinma
youtube:fabbydeinma
for enquiries: deinmakalio@gmail.com
3 John 1:2:Beloved, I wish above all things that thou mayest prosper and be in health, even as thy soul prospereth.
Subscribe to:
Comments (Atom)